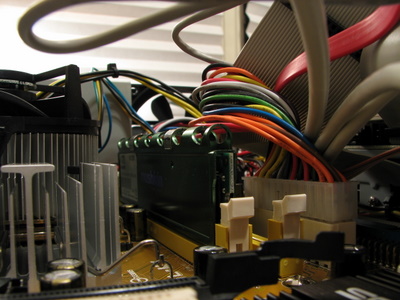
Besides working, family, home/auto neglected repair, and fiancé attention, I built a new PC. For those of you that have an interest in computer building will understand; those that don’t bear with me. My (now ancient) Dell 8500 Laptop just isn’t cutting it for 3D modeling and Adobe applications. I’ve been scraping by year after year as new software updates tax my computer more and more. Sorry 85 (computer’s kickname); times are a-changin’. I firmly believe computers are only a tool for architecture, but when a tool is subpar, it’s necessary to upgrade.
I started my college career in computer programming; until I realized it’s pretty dull and I’m not as enthusiastic about staying on one-side of the computer screen. Plus, I just wouldn’t enjoy all the extra time and money afforded by a computer science degree *sarcasm*. It’s been a while since I’ve built a computer, and with some Christmas fundage, it is time. For those who are inexperience with pc building, it is actually easy(video). Everything fits together beautifully; all cables in only one place.
With a magnetic screwdriver and a glass of Dewar’s, the build begins. The hermetic packages burst open with the smell of a sterile world far away. The parts are fresh; no screws are stripped…yet. It’s always a gamble on whether everything will work together on first boot. The case is easily cracked open with only one screw. Drive bays slide out like Russian dolls; the designers of this case are conscious of the amateur/novice computer builder. Power supply attached, HDD and DVD drive attached; the pinnacle moment of the installation is the CPU. The chip is packaged very carefully in its container. I carefully remove the temporary shipping apparatus and turn over the chip to reveal its vitals. I cradle the processor and make sure it doesn’t receive any static shock. One rogue static arc could end this install quickly. The processor sits in the mobo pin-to-pin and is securely clamped. The CPU fan is always awkward. It sits atop the processor and needs a good amount of force (an uneasy, almost breaking force) to secure it to the chip. Once this step is completed, the ram is installed and the computer is buttoned back together. The computer is complete…time for the lengthy Windows install; at least it runs on its own. 


... here's whats under my hood:
Intel C2D E6300
Asus P5L-MX
2GB (2x1gb) Mushkin Enhanced RAM
In-win case
Seagate SATA 160gb Hd
2 Comments
Love the video.
Good description of the process. I built one a few months ago and that's about how it went. Of course by 'I built one', I mean I ordered the parts and watched (and learned) while Beatledud put it together. Still running beautifully as I type this.
Had they started requiring laptops in first year when you began?
yup!
next time i suggest playing this while doing the cpu moment
Block this user
Are you sure you want to block this user and hide all related comments throughout the site?
Archinect
This is your first comment on Archinect. Your comment will be visible once approved.