The resilience and innovation of 19th-century China is the subject of a major new exhibition at the British Museum, designed by the exhibition and graphic design team at Nissen Richards Studio. ‘China’s hidden century’ focuses on the tumultuous period between 1796 and 1912, which led to the end of over 2,000 years of Qing dynastic rule and paved the way for the modern Chinese republic. The exhibition reveals a period of turmoil, but also of great innovation and creativity, driven by political, cultural and technological change. In the shadow of these events lie the stories of remarkable individuals – at court, in the military, in booming cosmopolitan cities and on the global stage – through which the period is brought to life.
The new exhibition is located on the Museum’s ground floor in the Sainsbury Exhibitions Gallery, purpose-built for temporary exhibitions, and will be open until 8 October 2023. The exhibition is a global first and was underpinned by a four-year research project, supported by the Arts and Humanities Research Council and led by the British Museum and University of London. Altogether, more than 400 people from 20 countries have worked on the show and research project. The exhibition is also accompanied by two books, both edited by Jessica Harrison-Hall and Julia Lovell: first, China’s Hidden Century, which sets out a fresh understanding of this important era through the themes of the exhibition. The second book is a who’s who of China in the late Qing period - Creators of Modern China 100 lives from Empire to Republic 1796-1912 - with 100 essays written in collaboration with about 100 scholars from 14 countries.
Visitors will be able to see and feel the textures of life in 19th-century China through art, fashion, newspapers, furniture – even soup ingredients! Many people not only survived but thrived as new art forms, such as photography and lithographic printing, flourished while at the same time technology and transport – the telegraph, electricity, railways – transformed society.
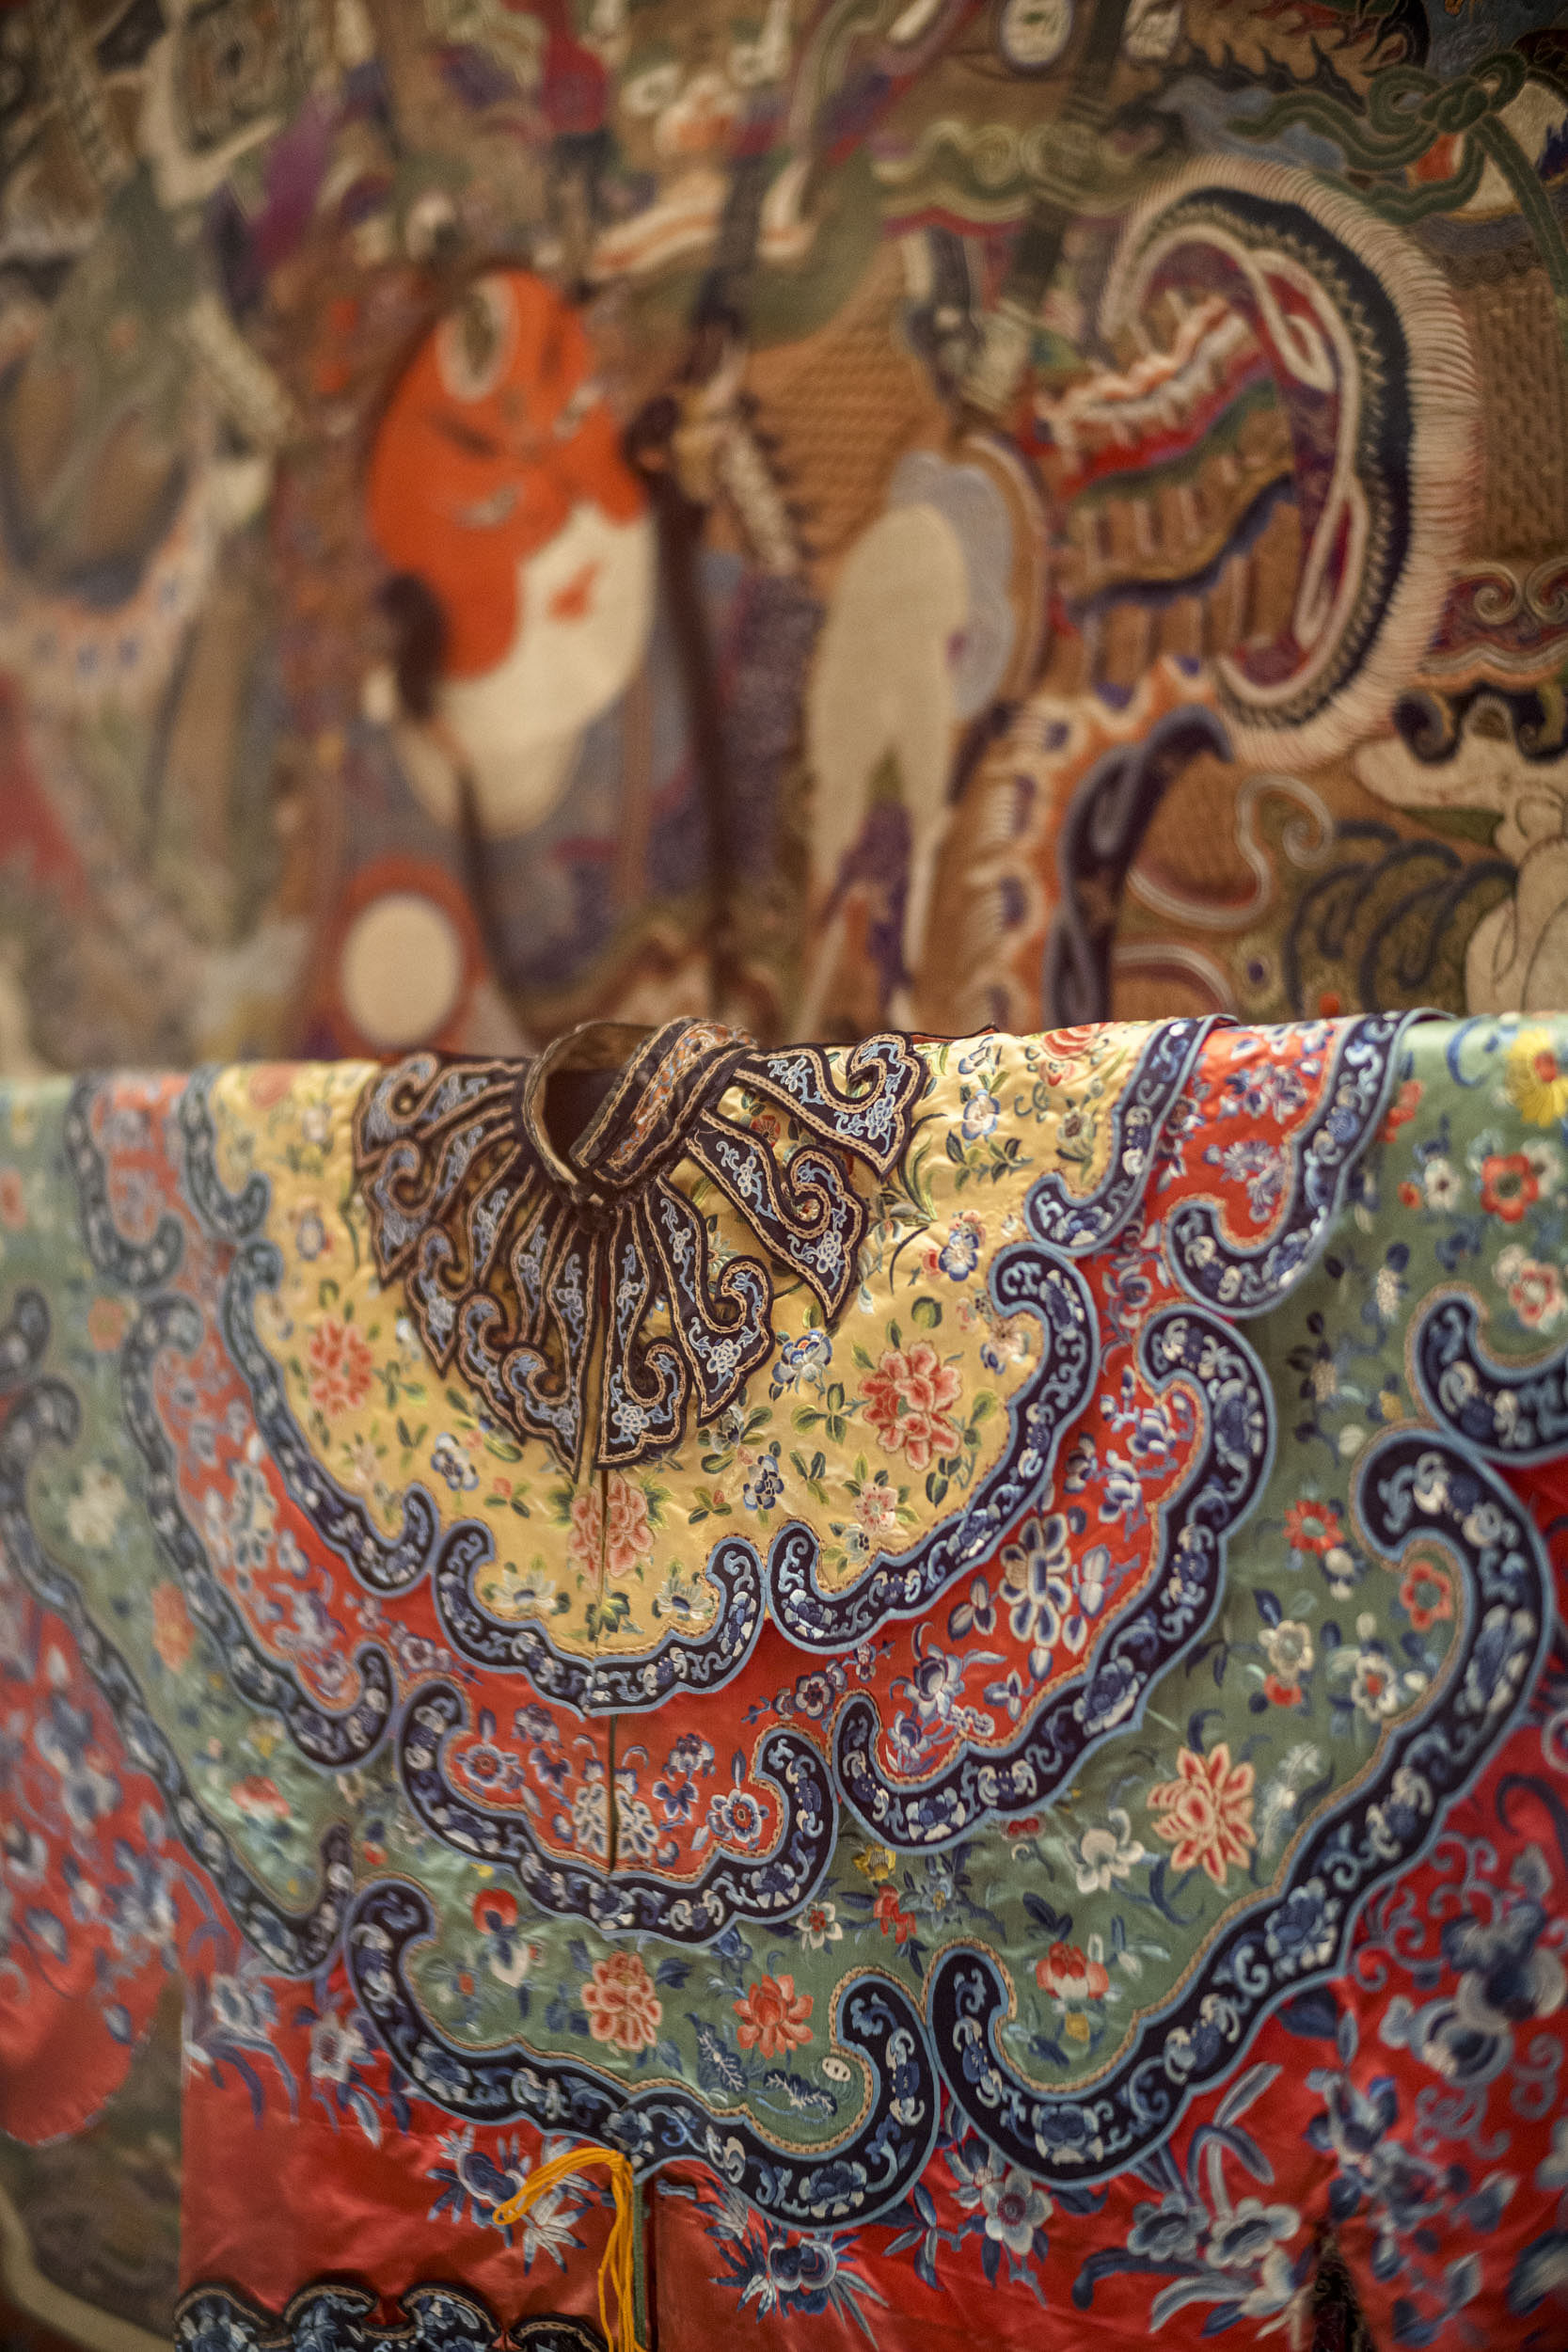
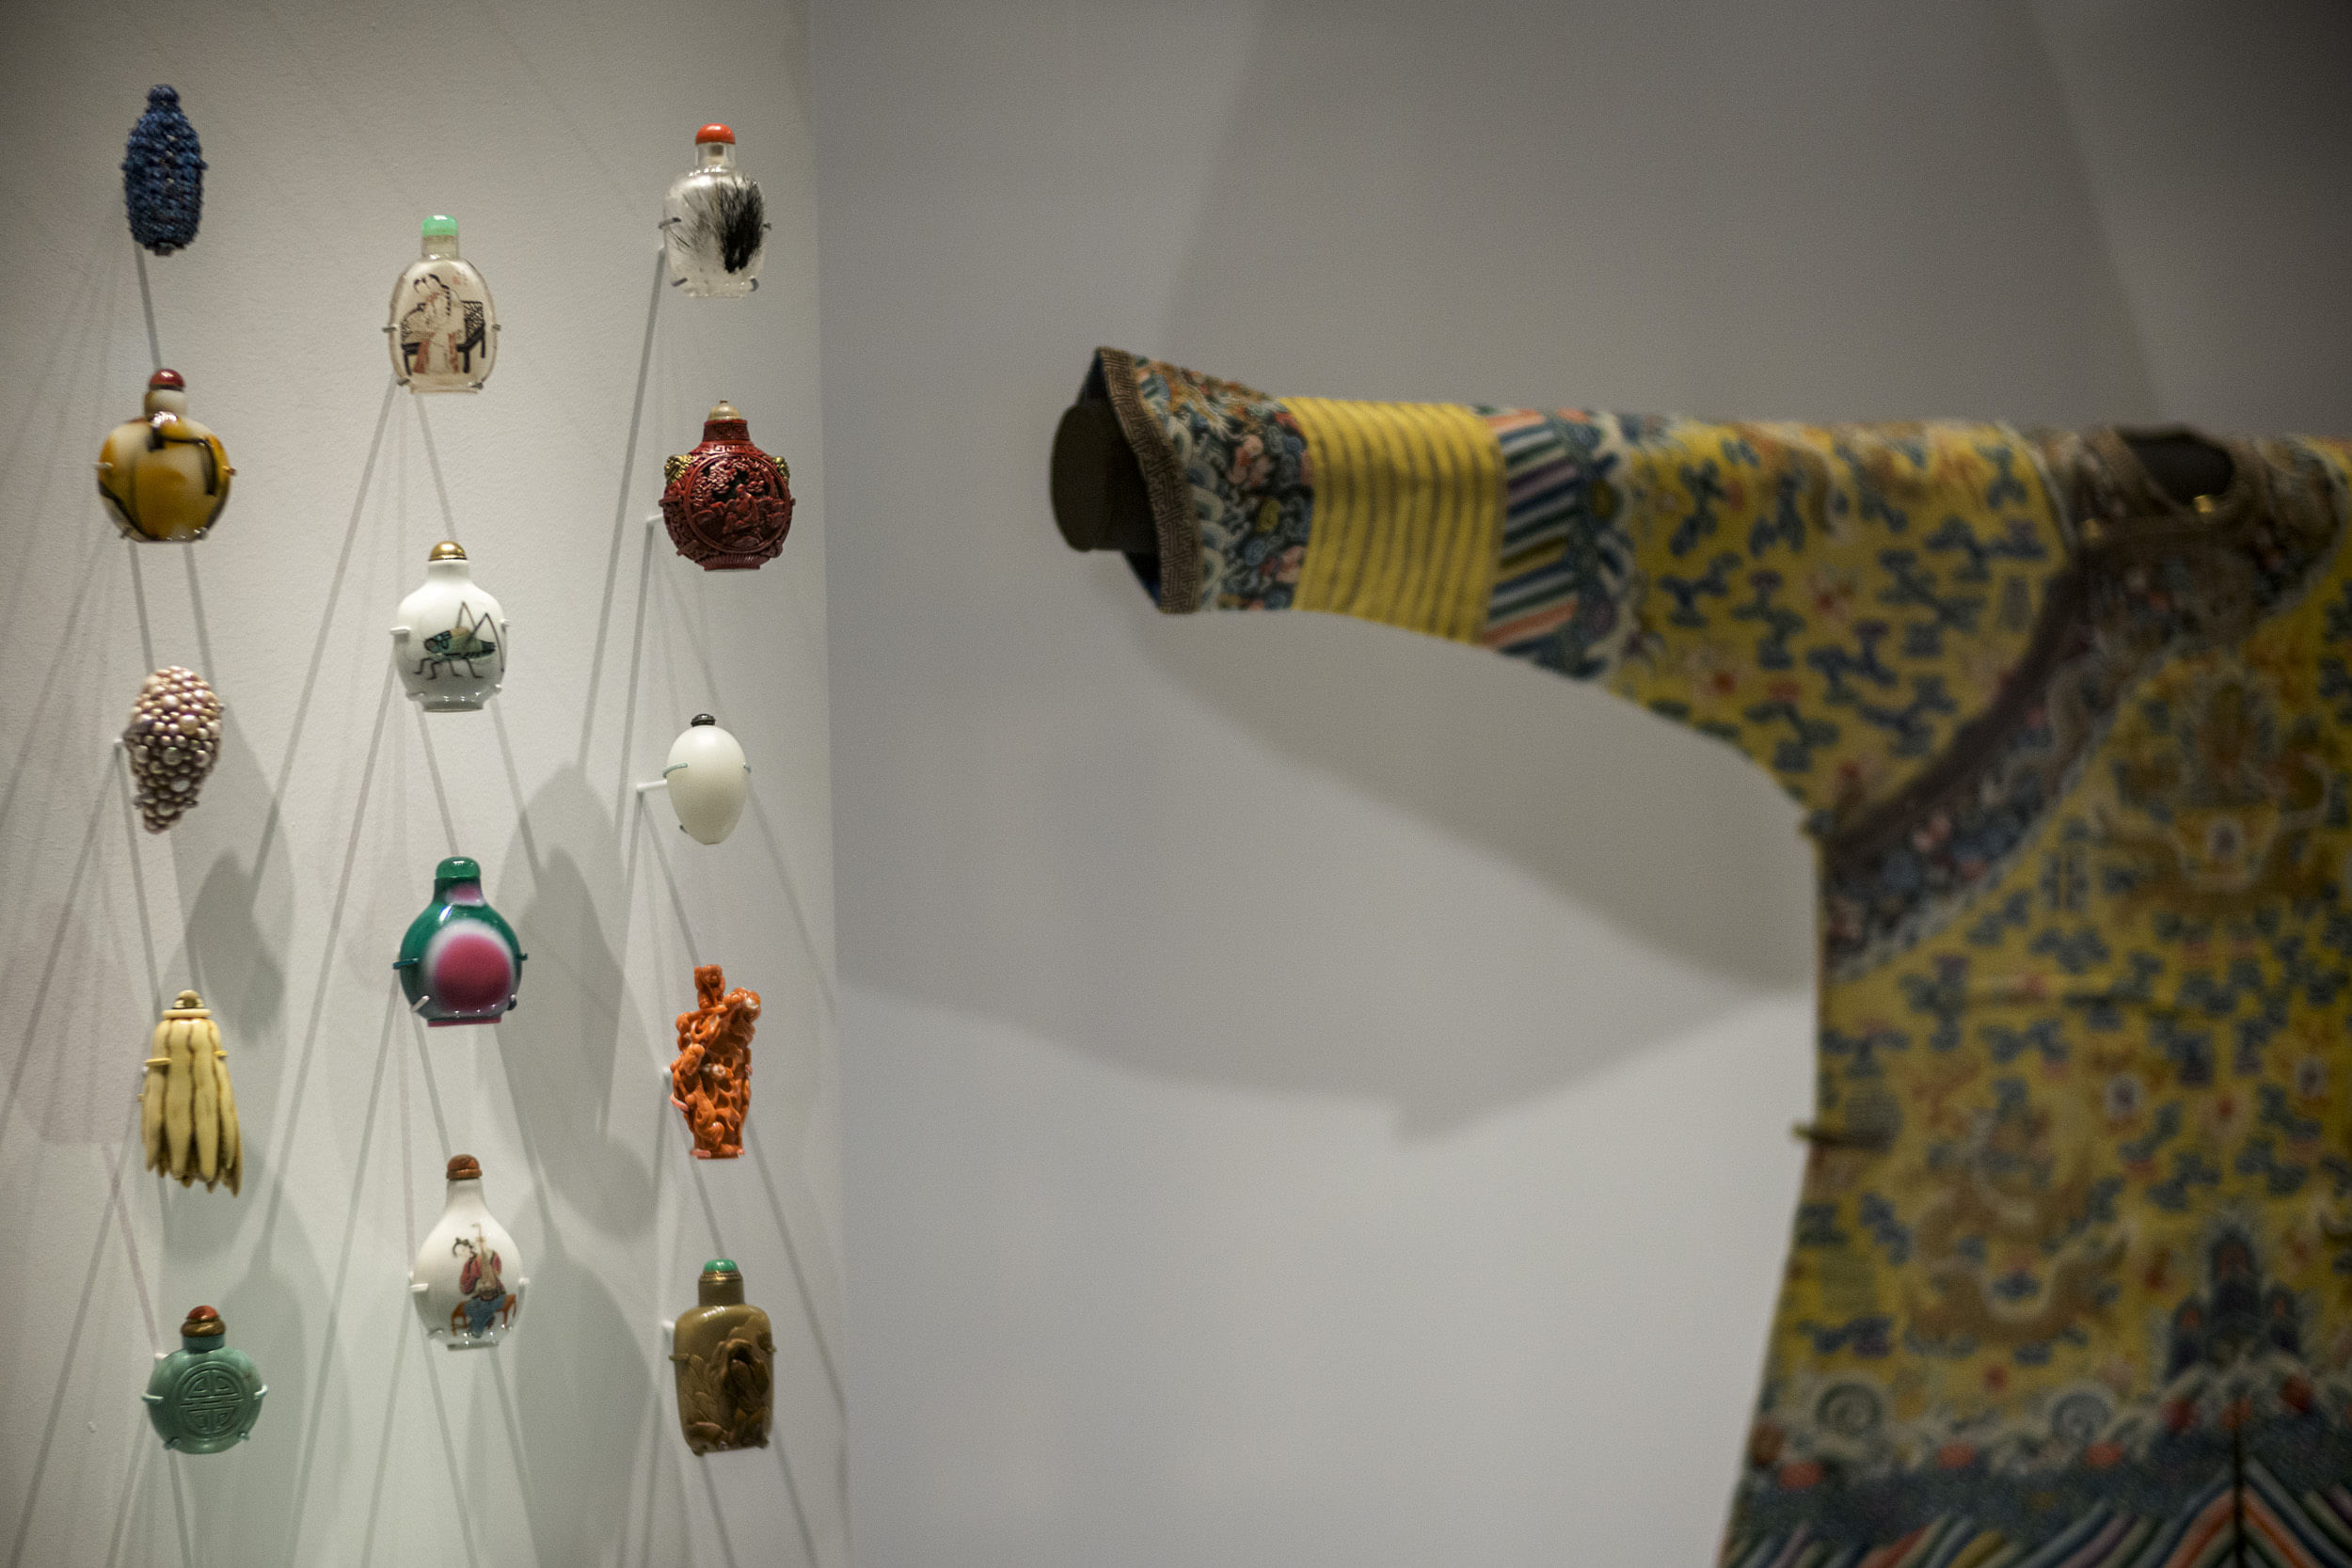
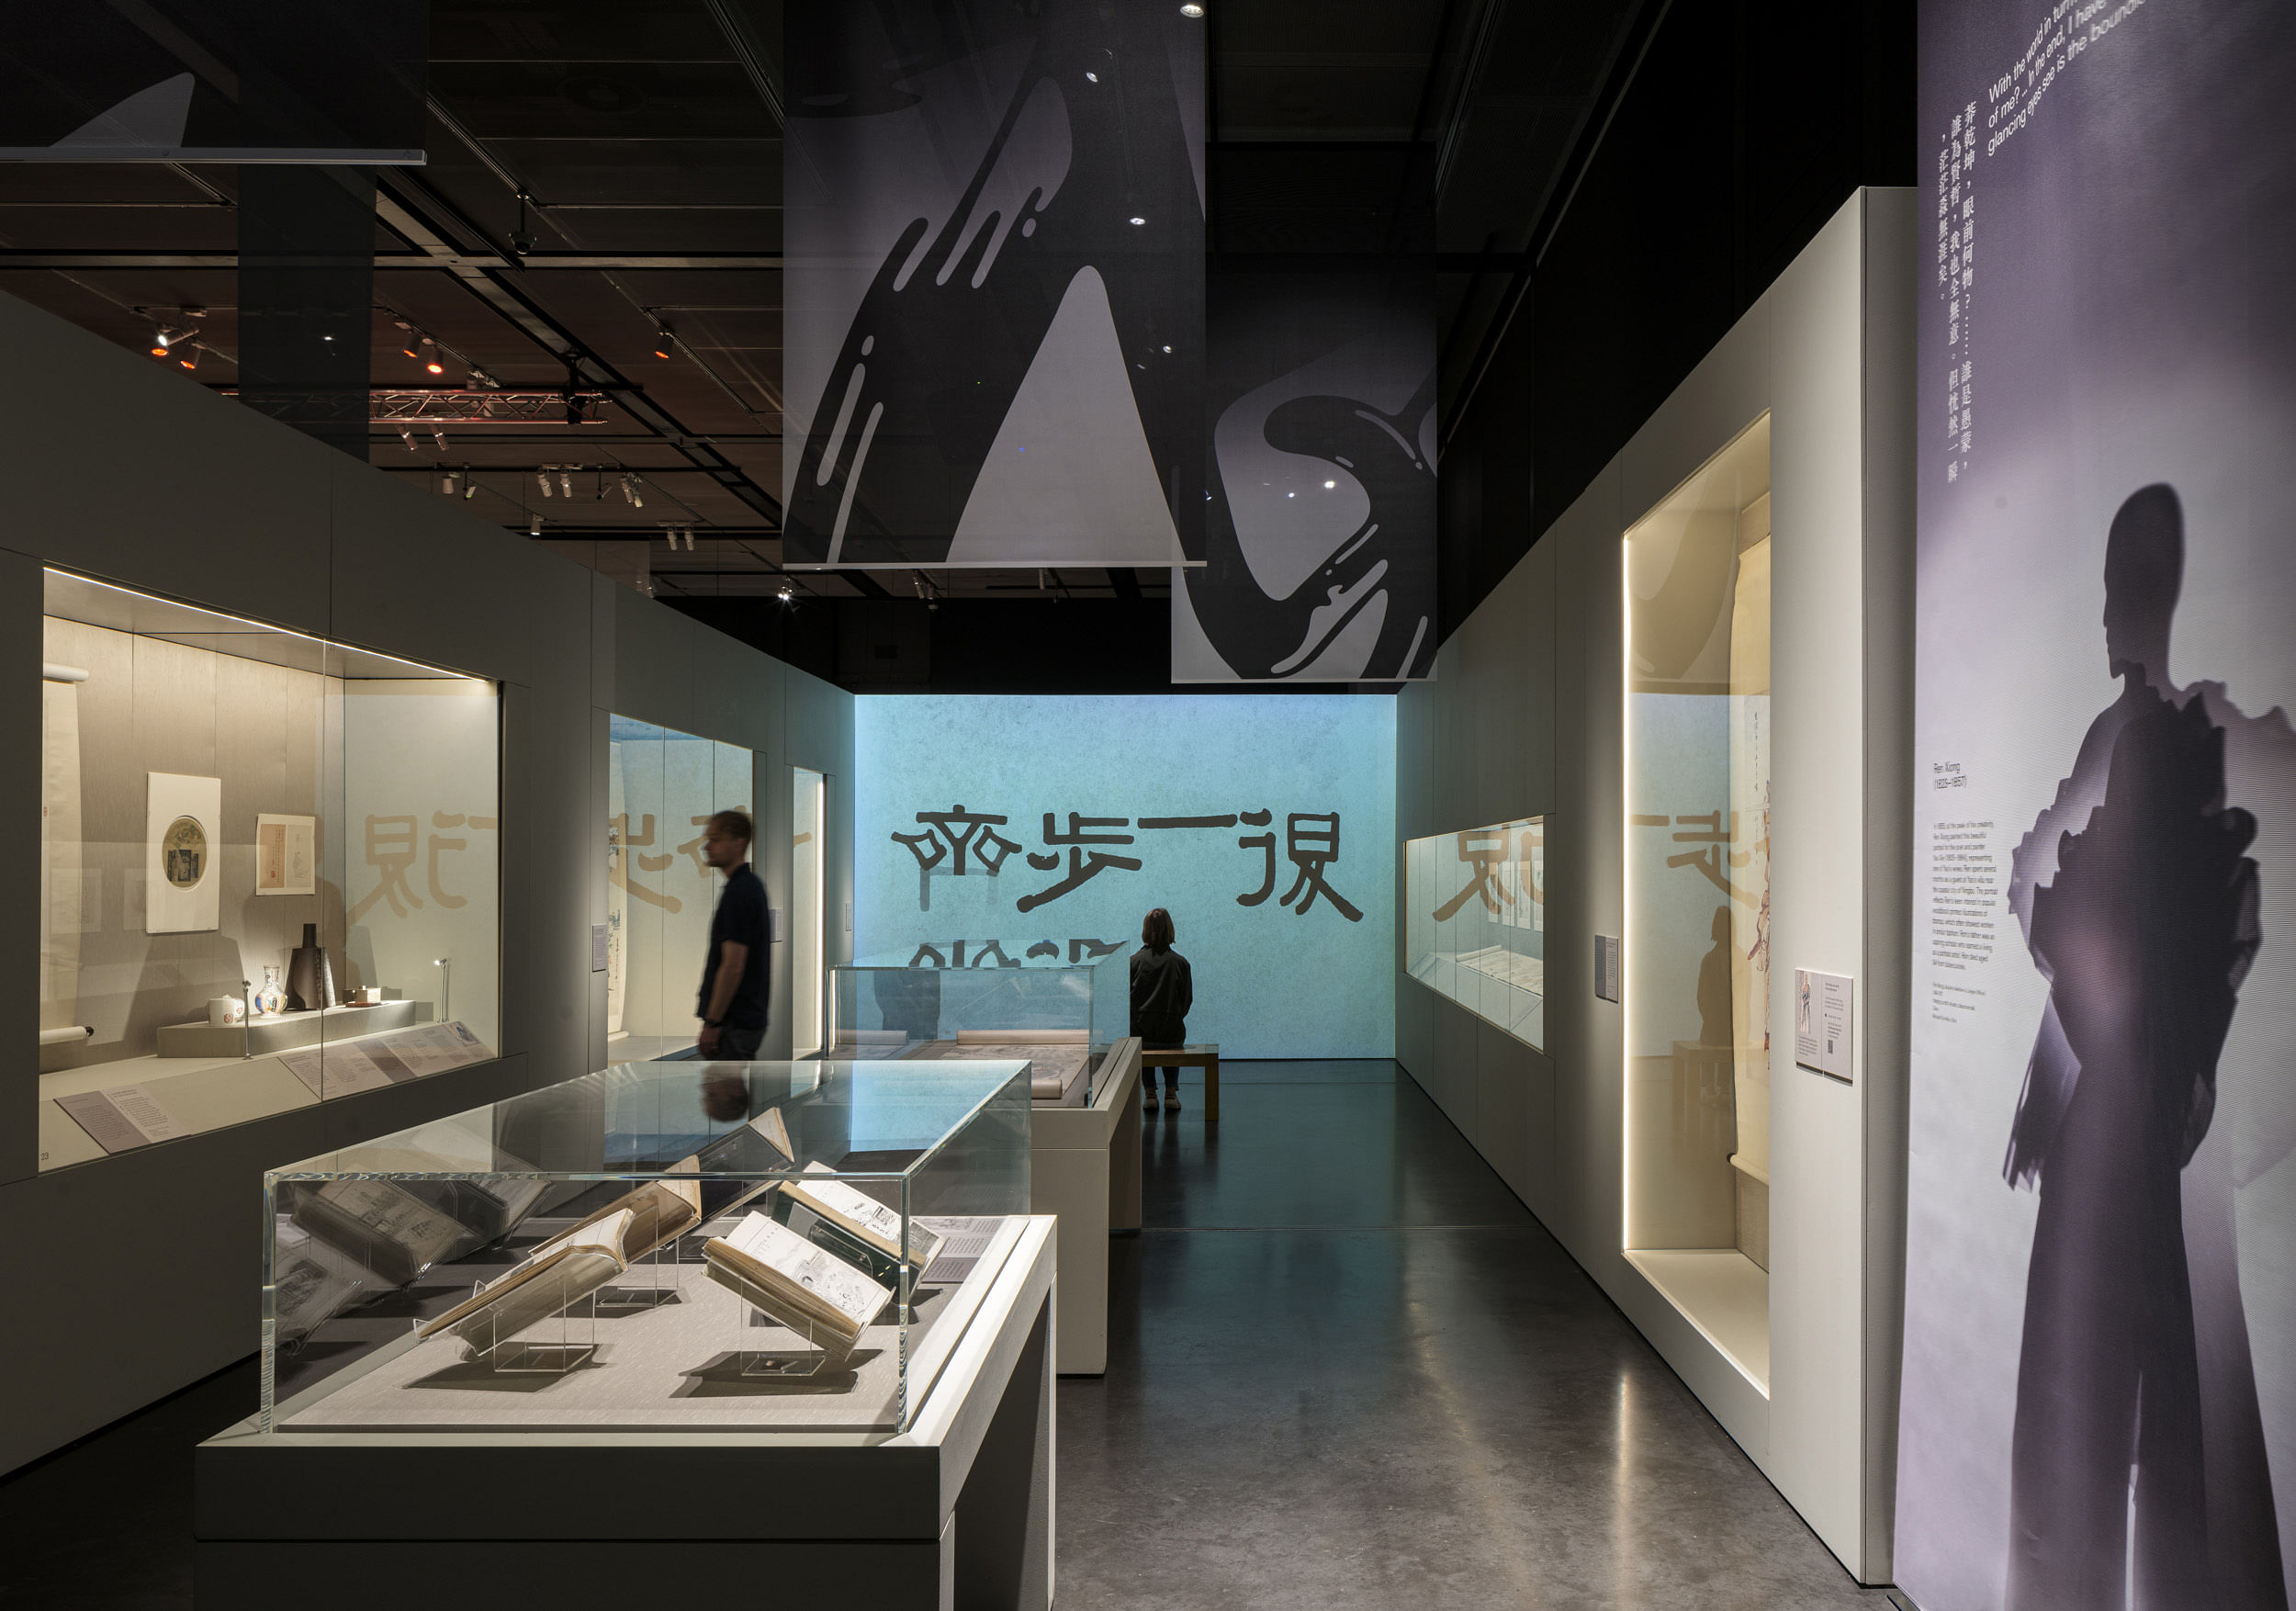
Design Approach The exhibition features over 300 objects, many of which were very large in size, including a number of colourful and beautifully-crafted costumes. An early-stage design decision was that the exhibition’s structures, colours and interpretation should sit seamlessly alongside and not compete with these spectacular objects. Nissen Richards Studio therefore designed the exhibition so the visitor would go on a journey through 19th-century China via a theatrical architecture, with the exhibition’s look and style created through the setting of a white and shifting shadowy world, using interesting and unusual fabrics and textured materials.
‘We wanted to ensure the visitor experience was object-led’ Pippa Nissen, Director of Nissen Richards Studio, commented, ‘so that the wonderful detail and colour of the objects wasn’t overwhelmed by our designs and the overall feel would be stripped-back, clean and architectural. Drama was added through design moves, such as large-scale images, screens and banners, which shape the visitor journey. The overall palette is neutral, featuring translucent screens made of a paper-like material called Tyvek, which interplay with shadow and light. The use of shadows, layers and textures adds subtle suggestion throughout.’
The exhibition’s six key sections mostly feature a subtle geographical locator - or associated landscape - and are developed with a focus on a set group of people. Objects are then embedded within the exhibition’s architecture to become intrinsic parts of the room they’re in, surrounded by the evocative, shifting atmospheres which create a sense of place and evoke the settings for the people who lived or worked there. The designs also include light, tonal shifts and sometimes graphic mark-making, as well as the creation of shadow photography of the key, highlighted individuals in the story, which was the result of a special collaboration between the British Museum, Nissen Richards Studio and students from the London College of Fashion.
Large-scale environmental graphics talk about people, places, and craft. Although the whole exhibition acts as an architectural series of interventions, there is a subtle shifting colour palette with that too, based on a subdued Qing colour palette. This is seen in highlights, and in fabric textures within showcases.
Graphic Design
Section titles and painting names in the exhibition are dual language, in English and Traditional Chinese characters. The fonts used for body text follow the accessibility/inclusivity guidelines given by the British Museum, while there was a little more leeway for the Chinese version, with the chosen font giving a subtle nod to a brush-like quality from handwriting.
The key graphic language of the exhibition is the use of banners, which are allusive and ethereal. The graphic approach was also based on a sense of place, using paintings of landscapes, the mountains and the sea, taken from images of the period – many in the exhibition.
Featured Individuals
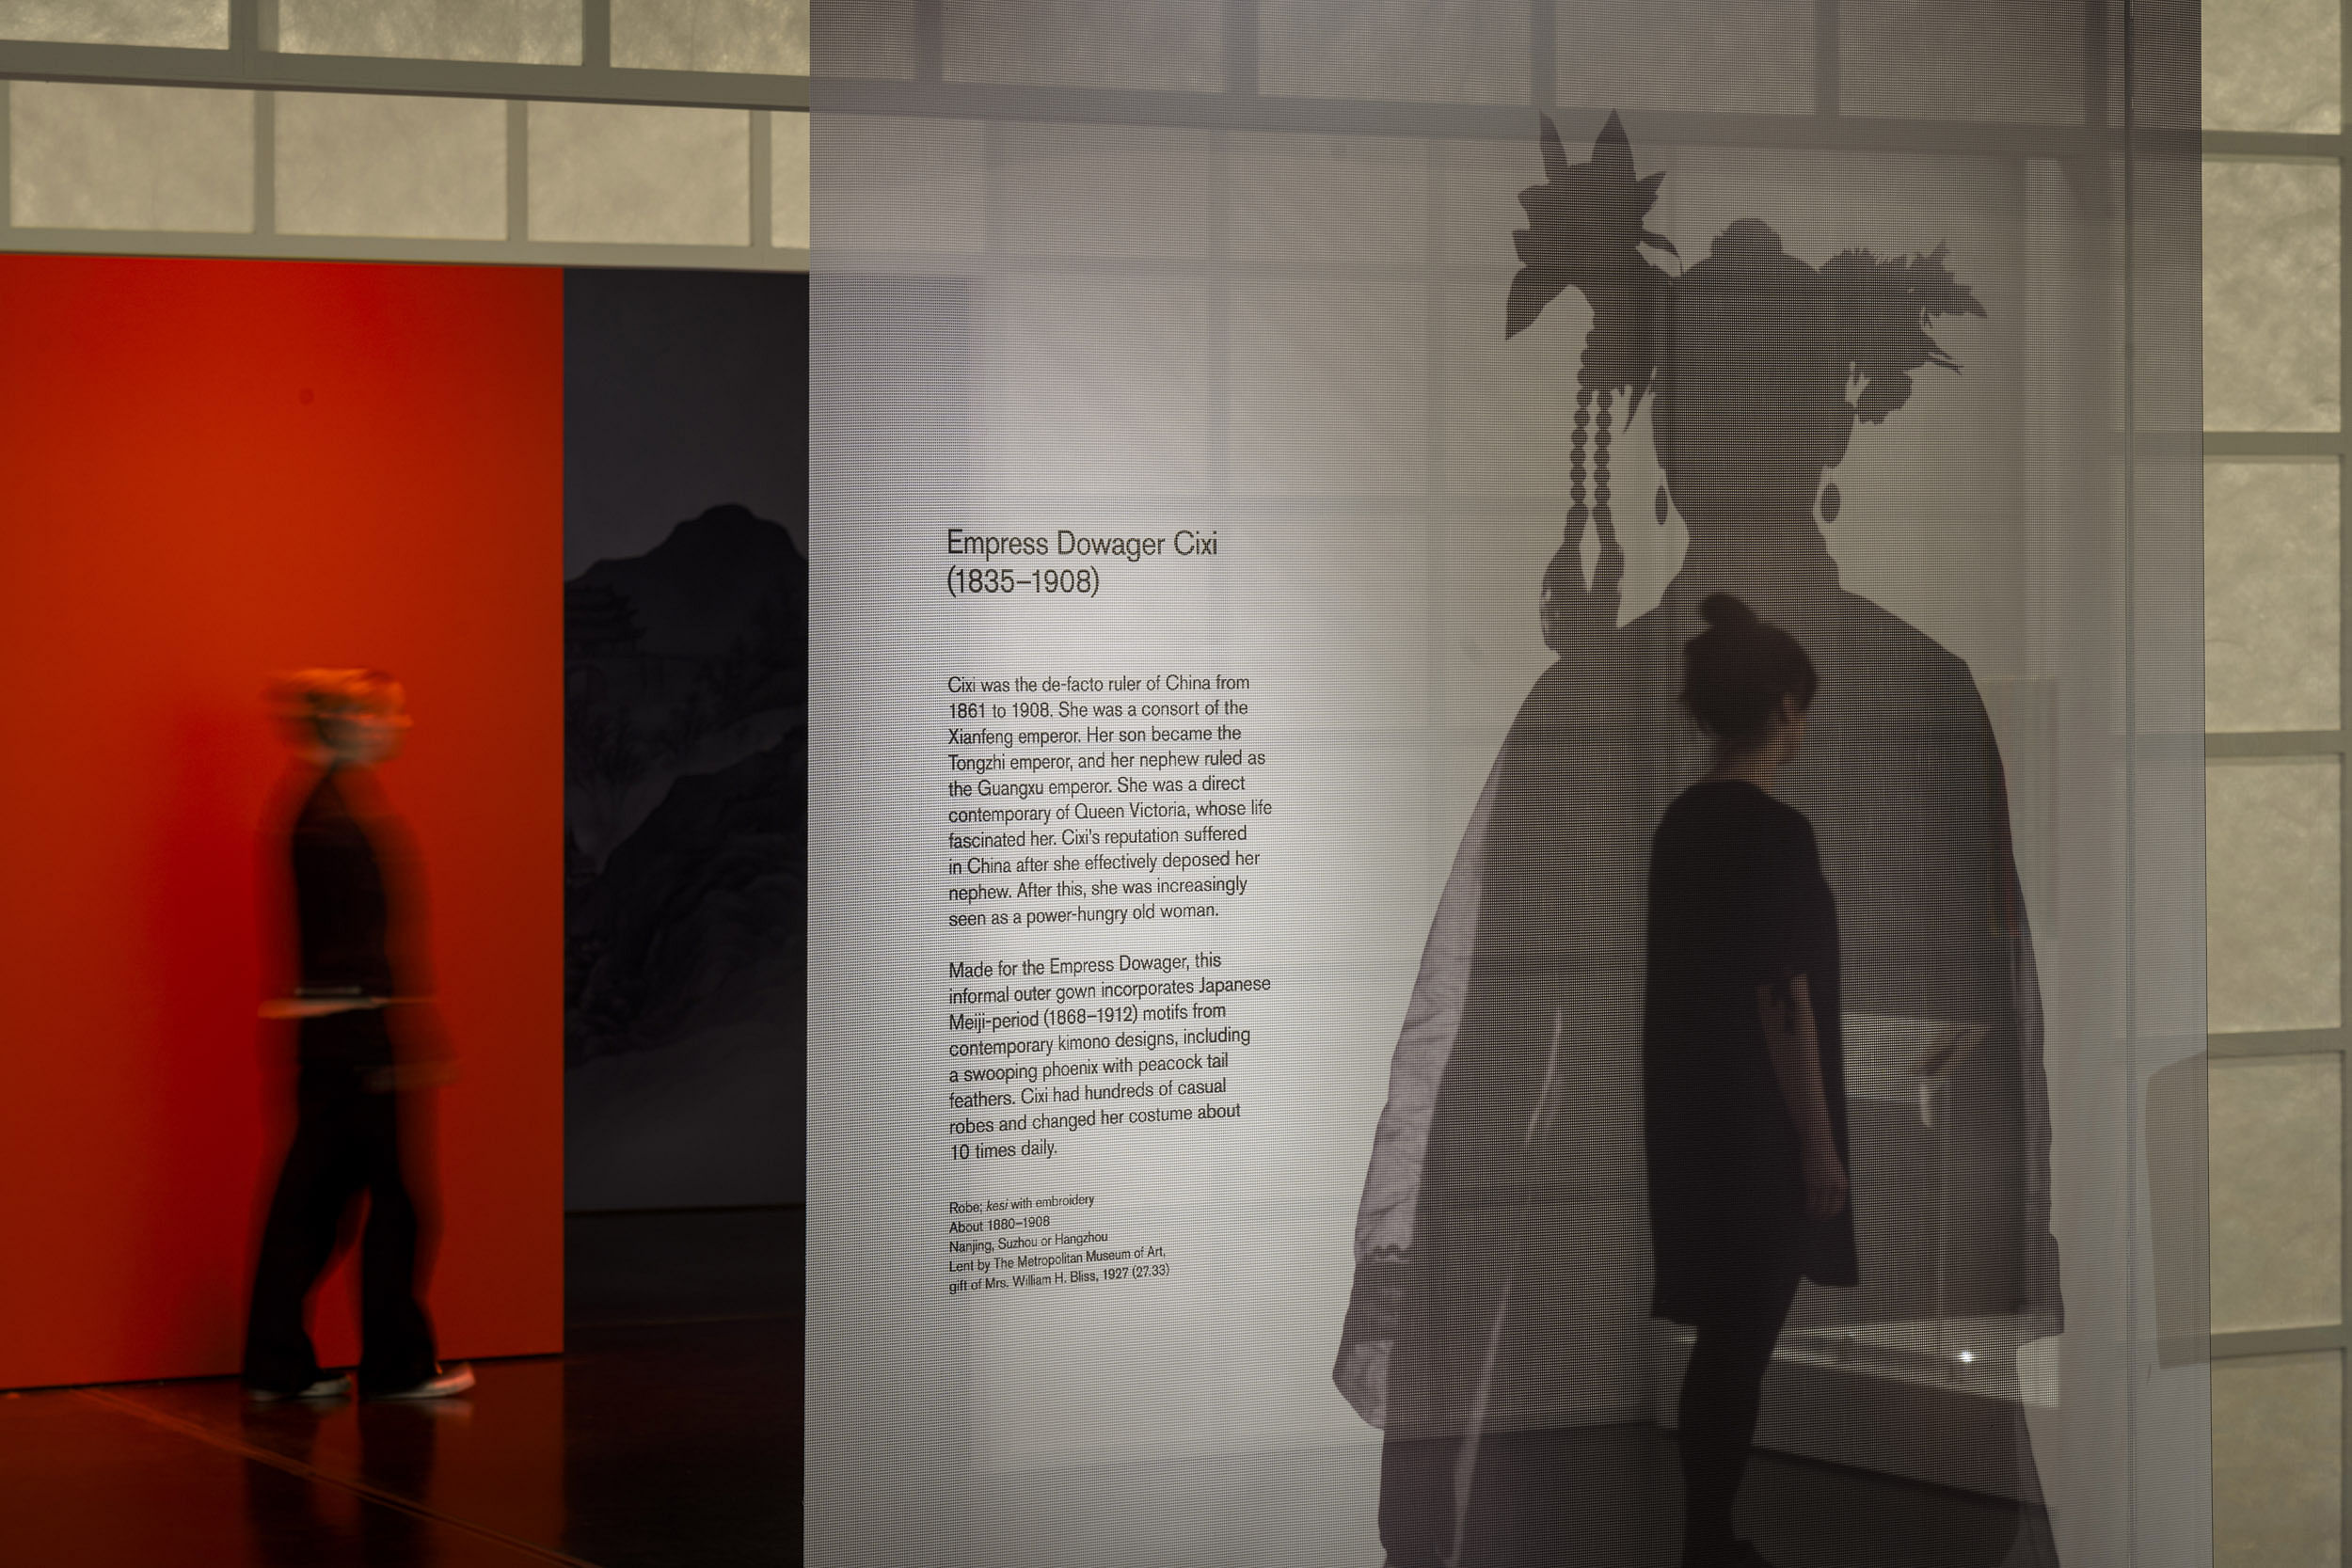
The major themes are brought to life by people, with one key highlight individual serving as the binding element or ‘special embodiment’ of that theme in each section. The 6m-high space allowed for dramatic hanging of floor-to-ceiling illustrative banners for each theme depicting these highlighted individuals. Alongside the objects, figures from the past are introduced through these transparent glowing banners, accompanied by sound, with the silhouettes illustrating the breadth of life within this time period, ranging from a court woman, a dowager empress, a soldier and an artist to a housewife, a merchant and a revolutionary, poet and feminist.
Nissen Richards Studio wanted to create as authentic an experience as possible when it came to the depiction of these figures and brought on board a team of students and tutors from the London College of Fashion’s MA Costume Design for Performance course to achieve this. Students created costumes for each character, using a mixture of details guided by the Museum’s experts – combined with theatrical imaginings. This collaboration was incredibly fruitful, and even involved a workshop by the film and stage costume designer Tim Yip, who took part in a masterclass and gave an inspiring talk to the students.
Models were chosen for their close resemblance to the characters being portrayed or for their specialist knowledge of that character. Each student was then paired with a model, with the students dressing the volunteer and working with them to create poses that would describe a character via a moment or a stance, thereby becoming more of a theatrical representation. Some of the characters’ costumes were more controlled and literal, while others worked better with slightly more stylised details.
The final costumes were photographed at Nissen Richards Studio’s offices - experimenting with lighting techniques and different screens, to give an effect of peopling the exhibition at a real scale. This treatment sits alongside incredibly detailed costumes exhibited within cases to give a feeling of people from the past. The idea was the visitors would meet people from that time to help identify how people lived and create an emotional connection. By connecting these images with well-researched voices, it gives visitors and impression of being immersed within the period.
Exhibition Walk-through
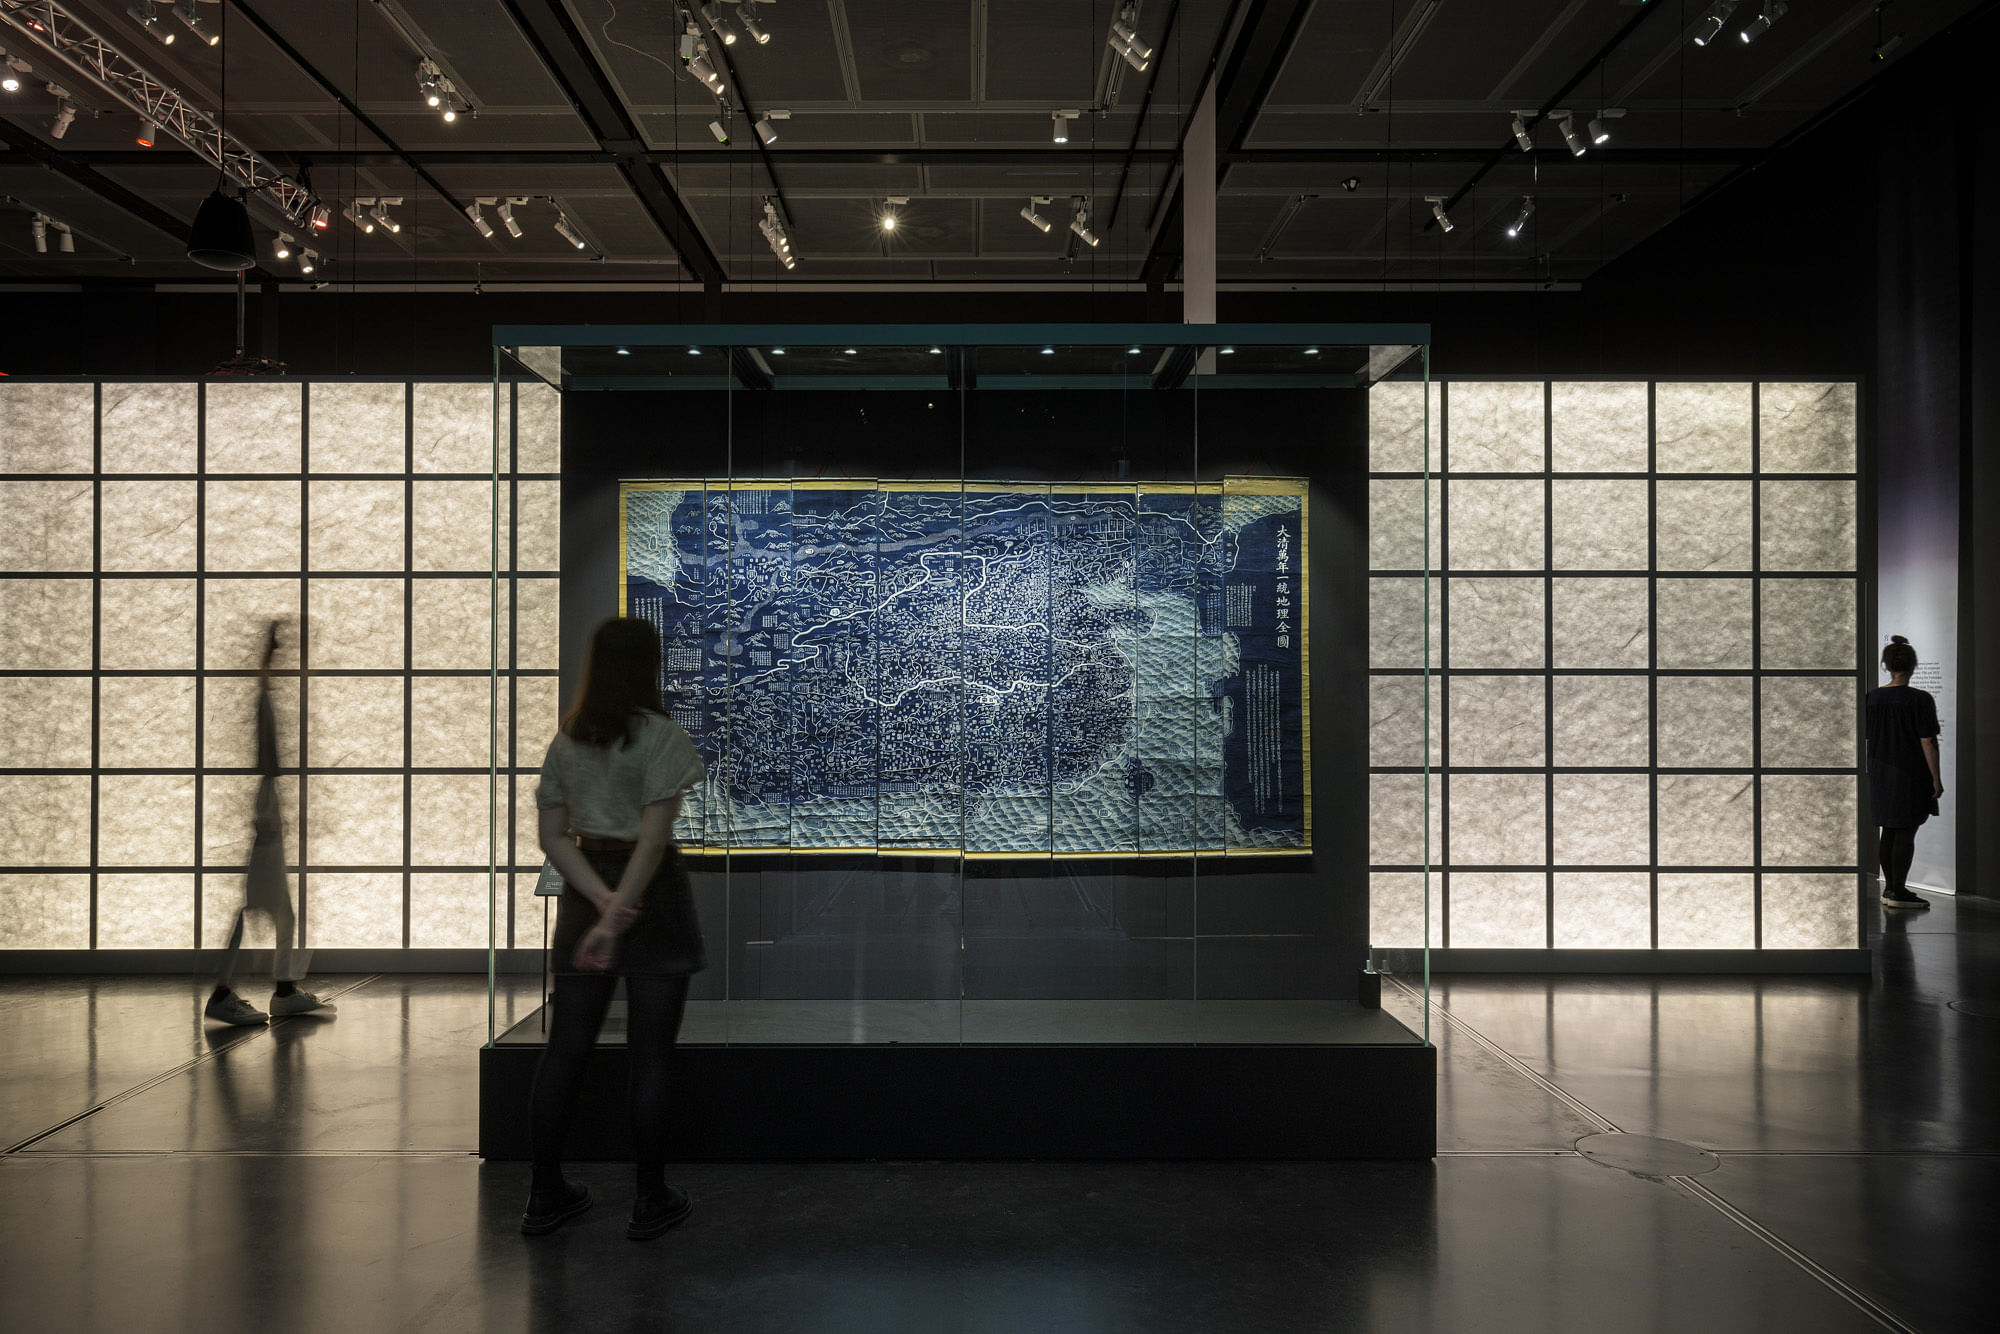
The Introduction section is a place of orientation in place and time. The language of layers is introduced immediately here as a play on ‘hidden China’. This darkened area features first a quotation of a relatively unknown Manchu poet, who questions the very idea of our existence. There follows a mysterious glowing Tyvek wall to set the tone, while also beginning the exhibition’s people thread, depicting individuals that visitors will meet later in the exhibition. In the introduction section, the shadow of an ‘unknown woman’ greets visitors, along with a beautiful original large map and some key objects to set the scene. The ‘unknown woman’ is a courtier from the imperial court and is based on a real portrait, though her identity is not recorded.
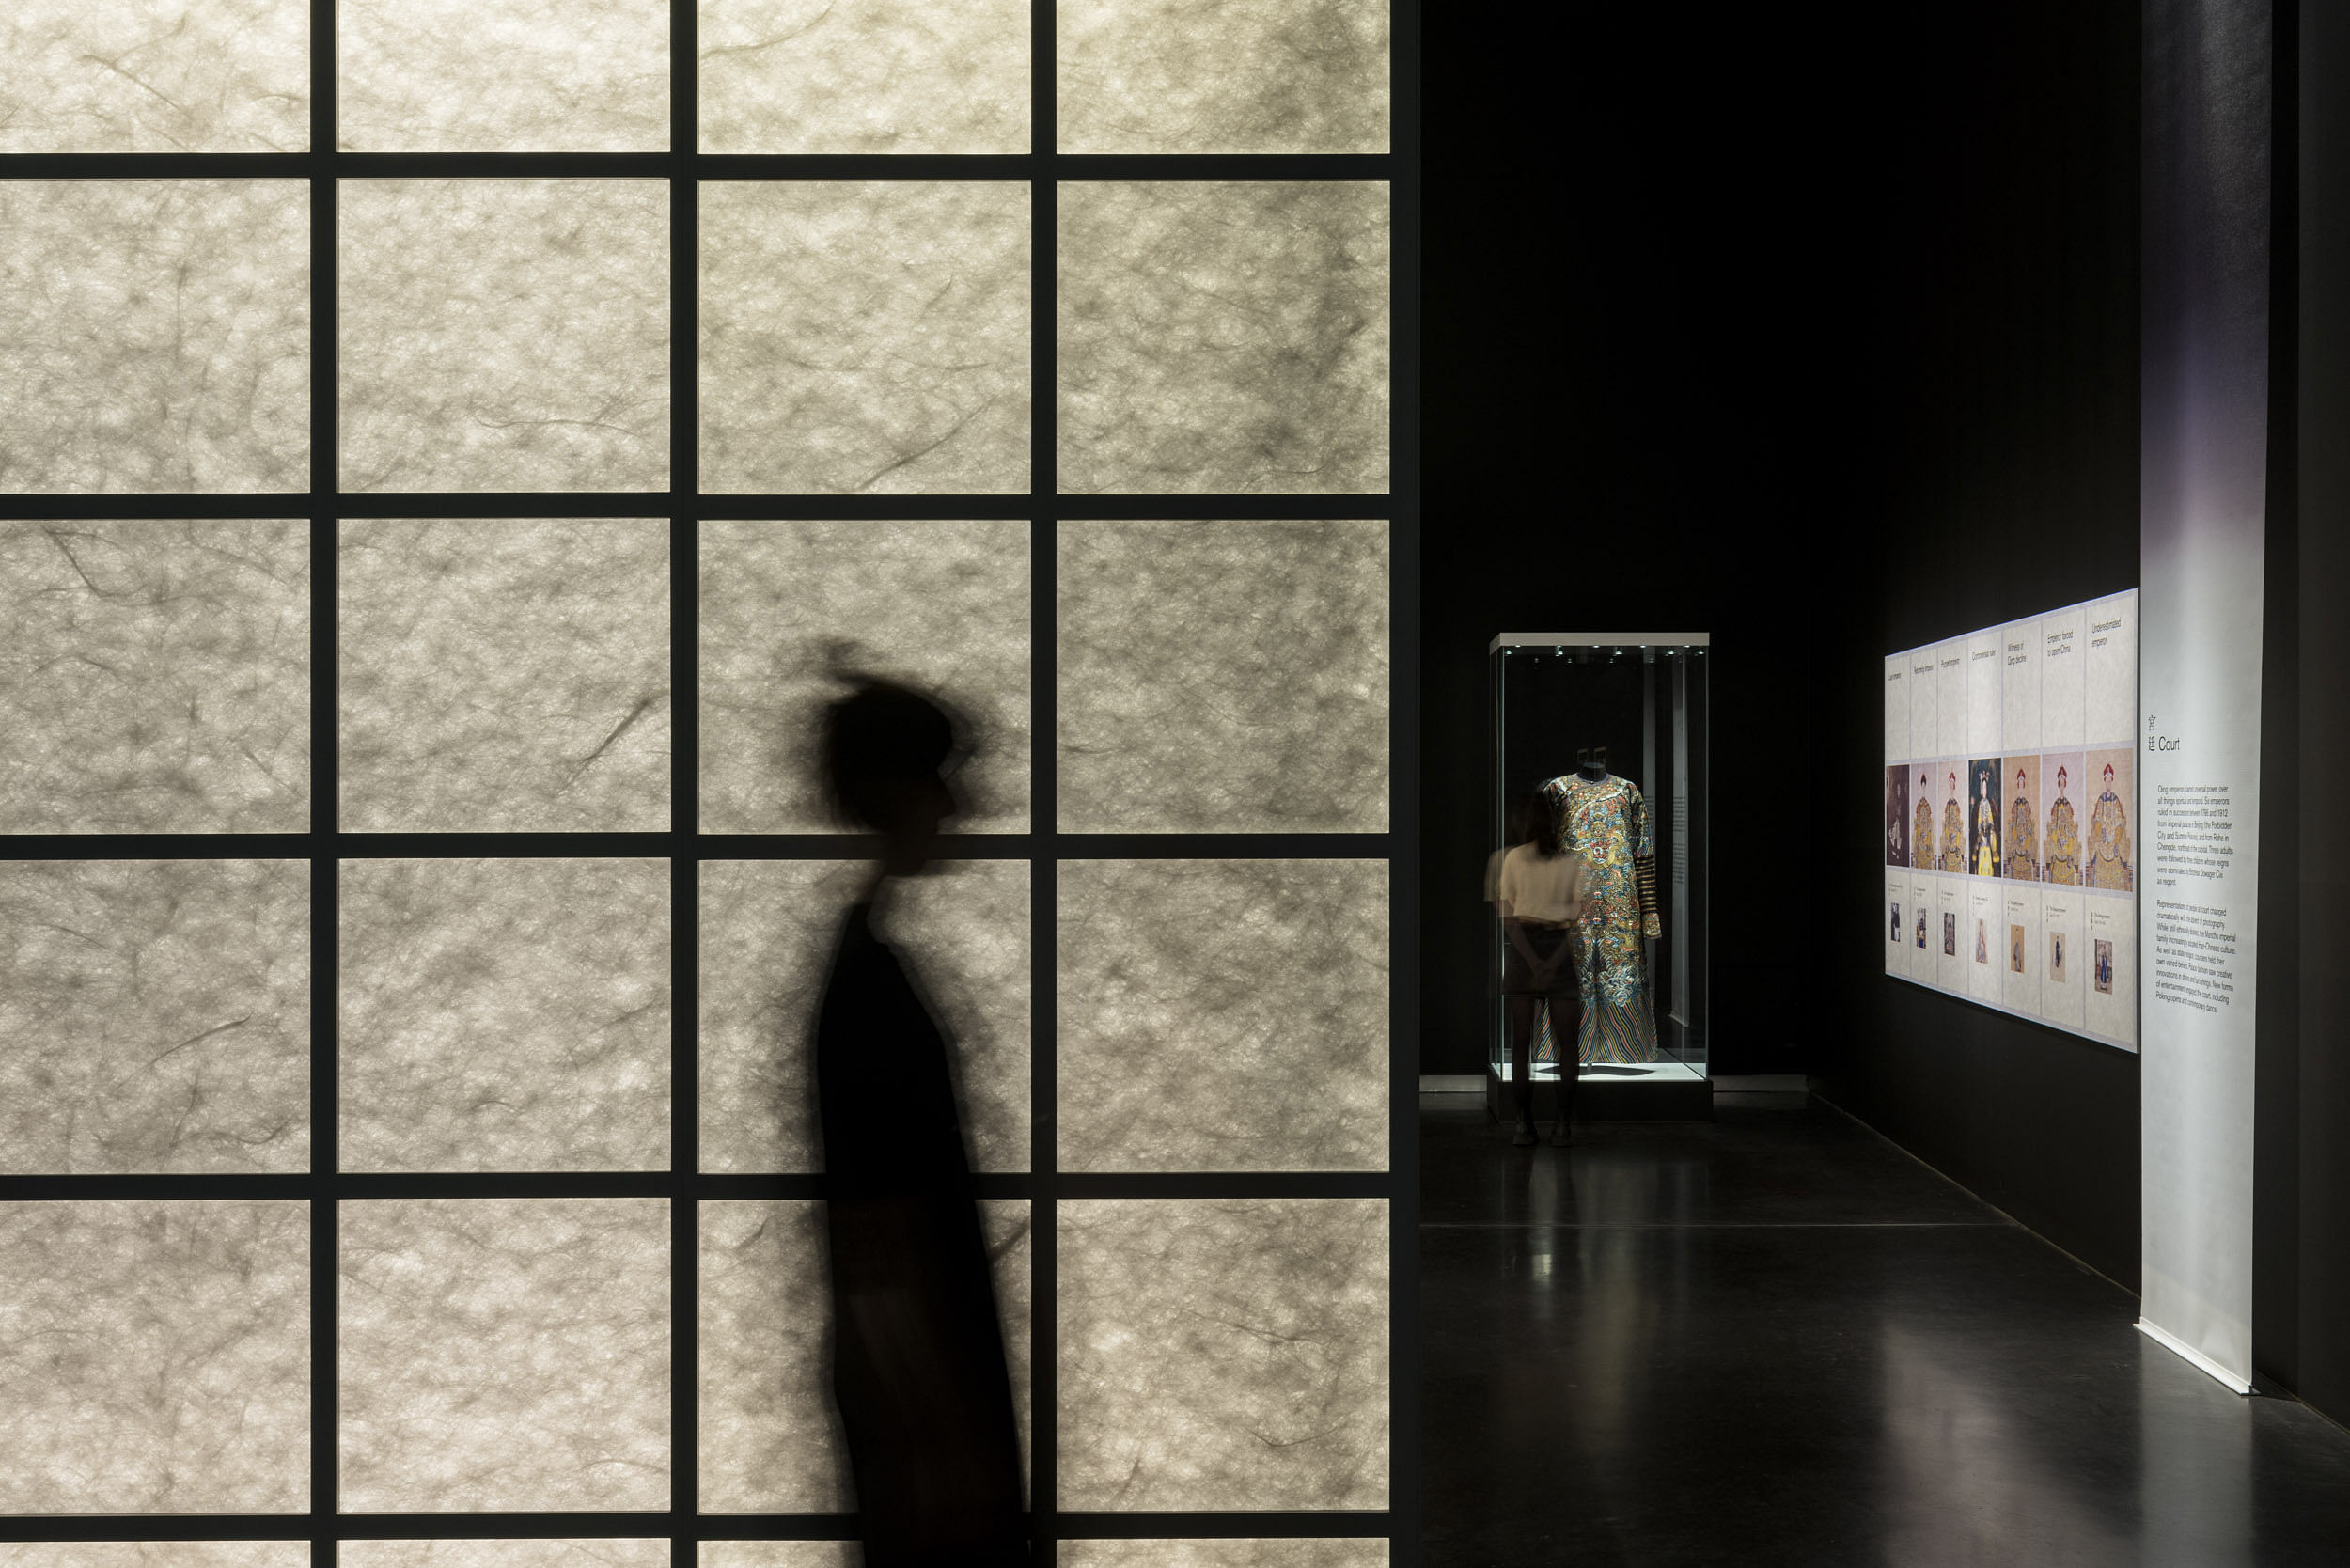
The first themed area is the Court, based on the Imperial Palace in Beijing. This is a very light area, whose treatment is based on symmetry, order and layering. A graphic intervention shows the timeline of Qing dynasty rulers from the long 19th century, followed by a costume originally worn by one of its adult emperors. This is very much an architectural space with a scene build, in terms of setworks, that includes Tyvek screens to give visitors a perspective through the space.
The highlighted individual story in this space is that of Cixi, the Dowager Empress. Surrounding objects are given a very pure and clean treatment to represent the symmetry and order of the court. Architectural structures and scenic screens evoke the architecture of the Imperial Palace, moving towards a warm red wall as if bathed in light. Objects sit between the layers as if held by the architecture.
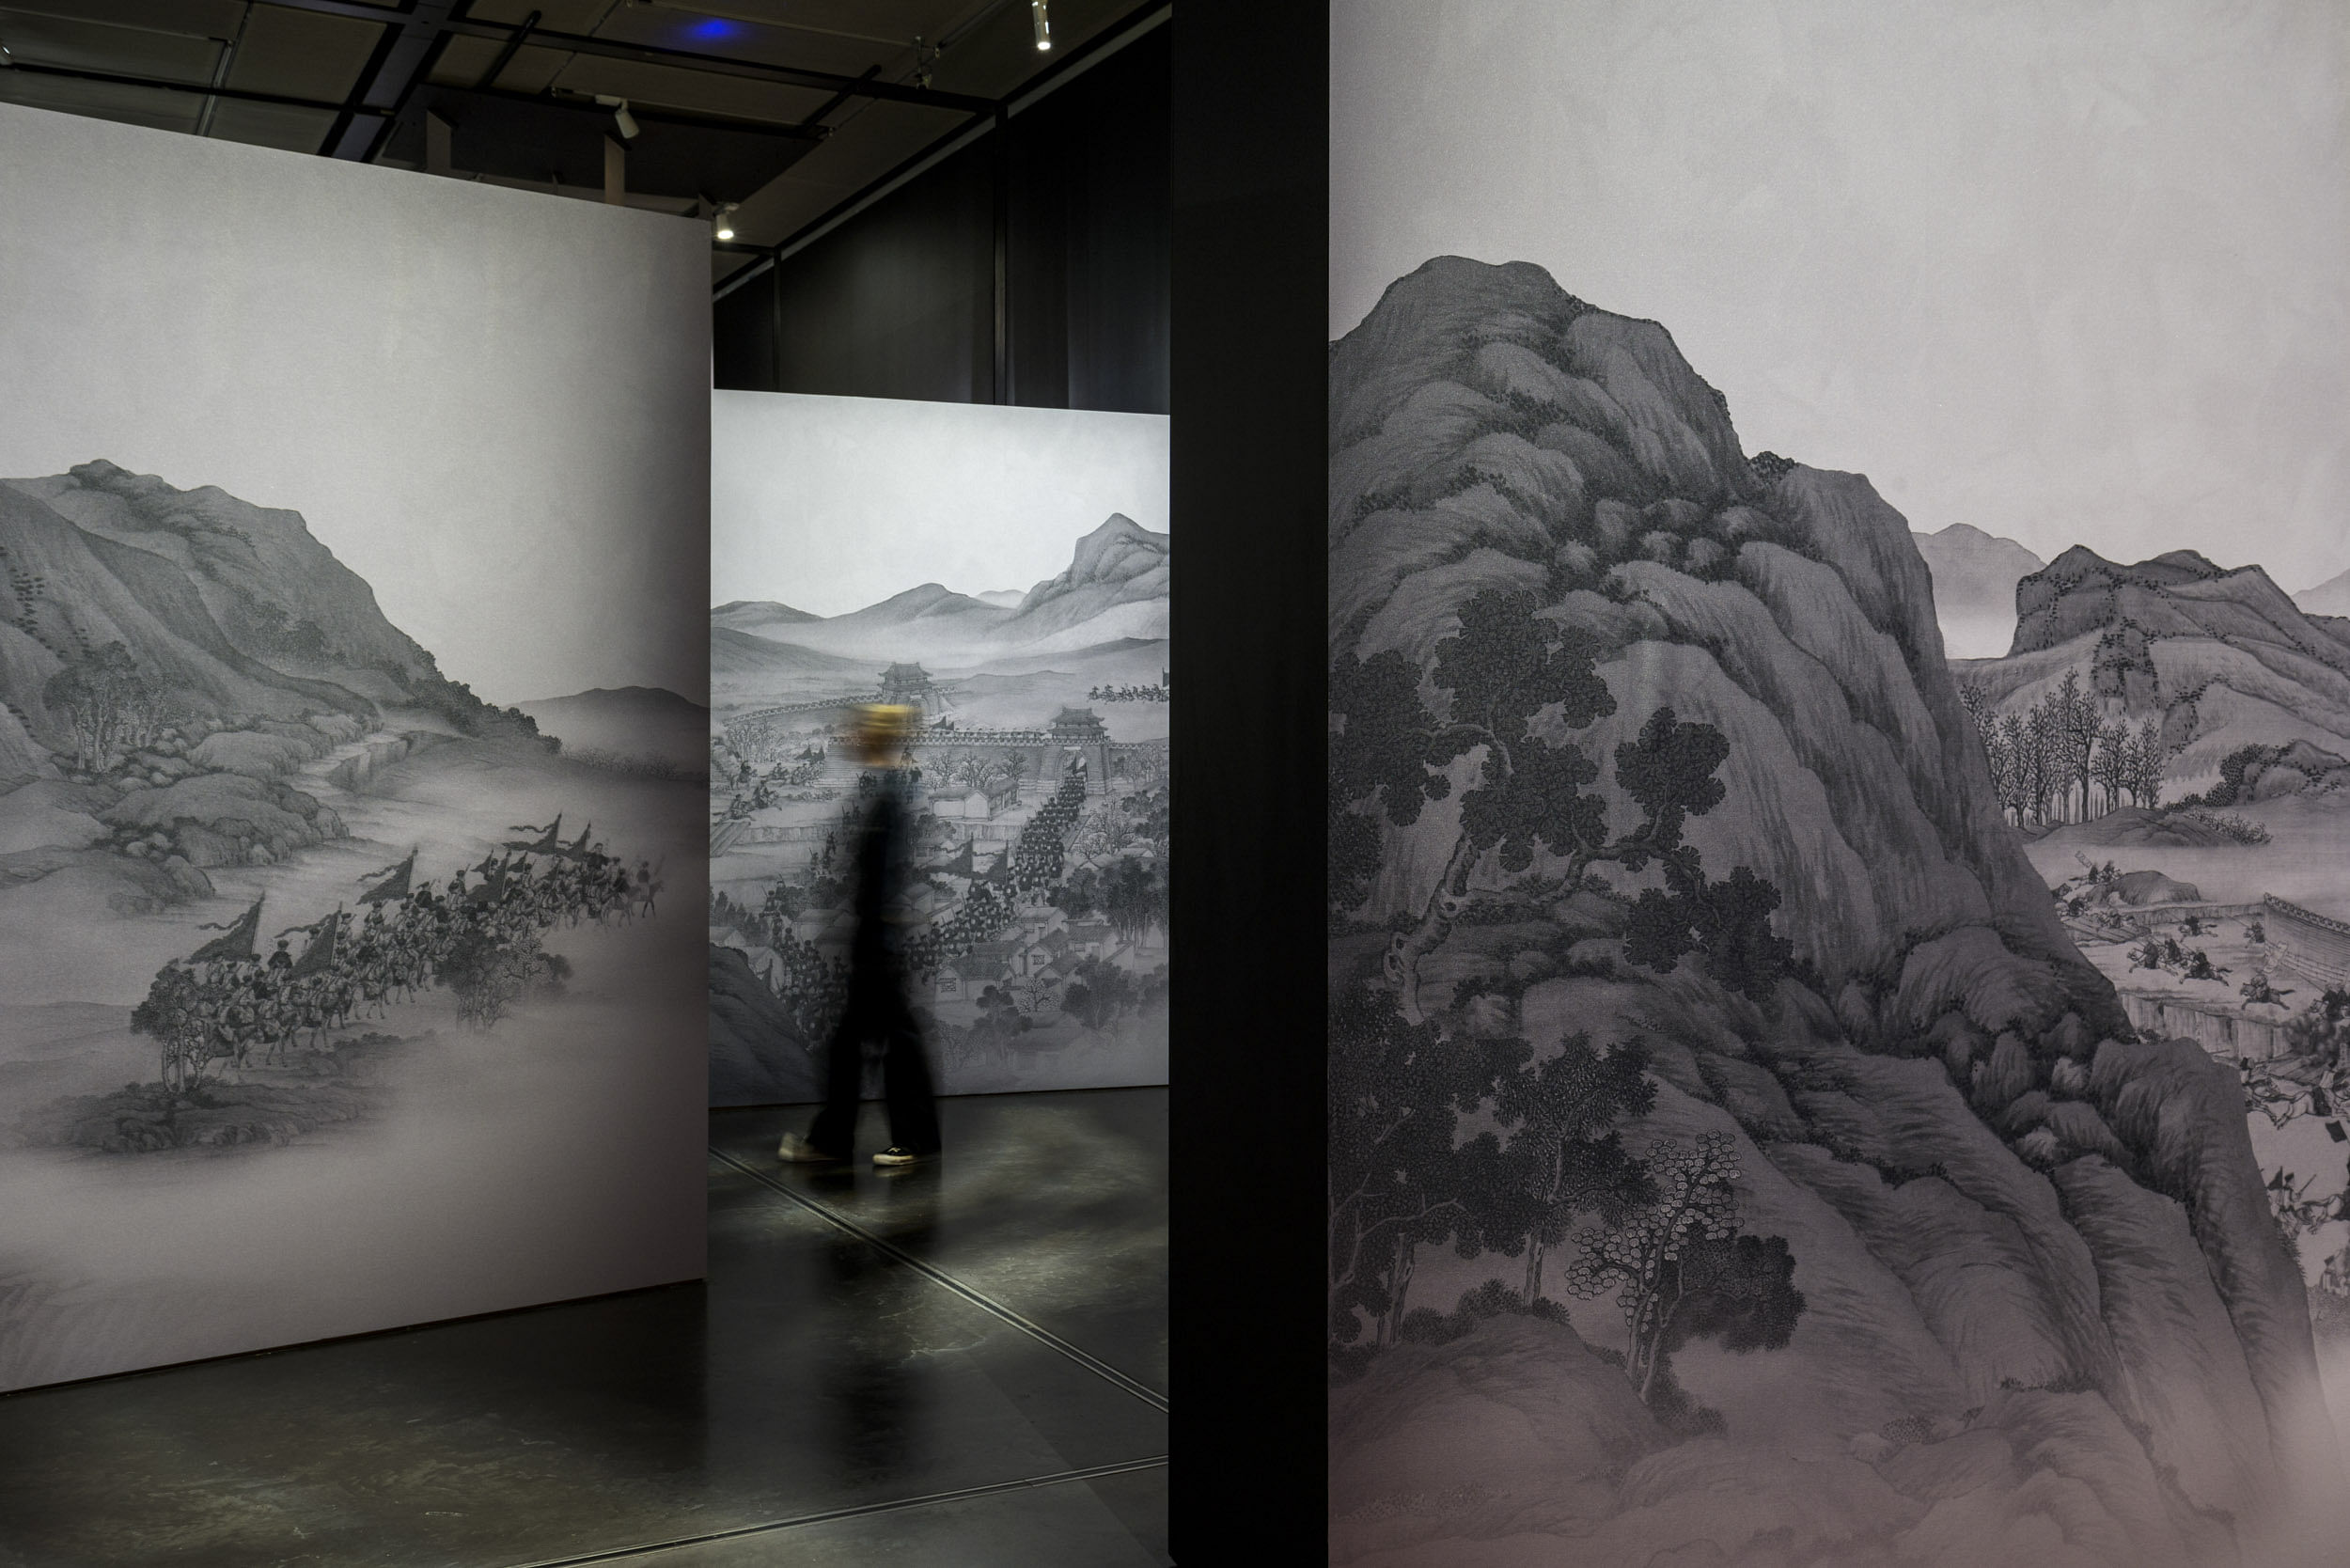
The theme of the second area is the Military. The design architecture here is asymmetric with fractured walls, depicting a landscape as a theatre set, which visitors wander through, contrasting with the bright symmetry of the court. Three monolithic wall fragments – measuring 3 x 4m – each contain many objects and costumes on the reverse side, revealing stories and featuring a broad mix of items from military costumes to paintings, documents, ruins and weapons. The key highlighted individual here is ‘a bannerman’ – an elite soldier.
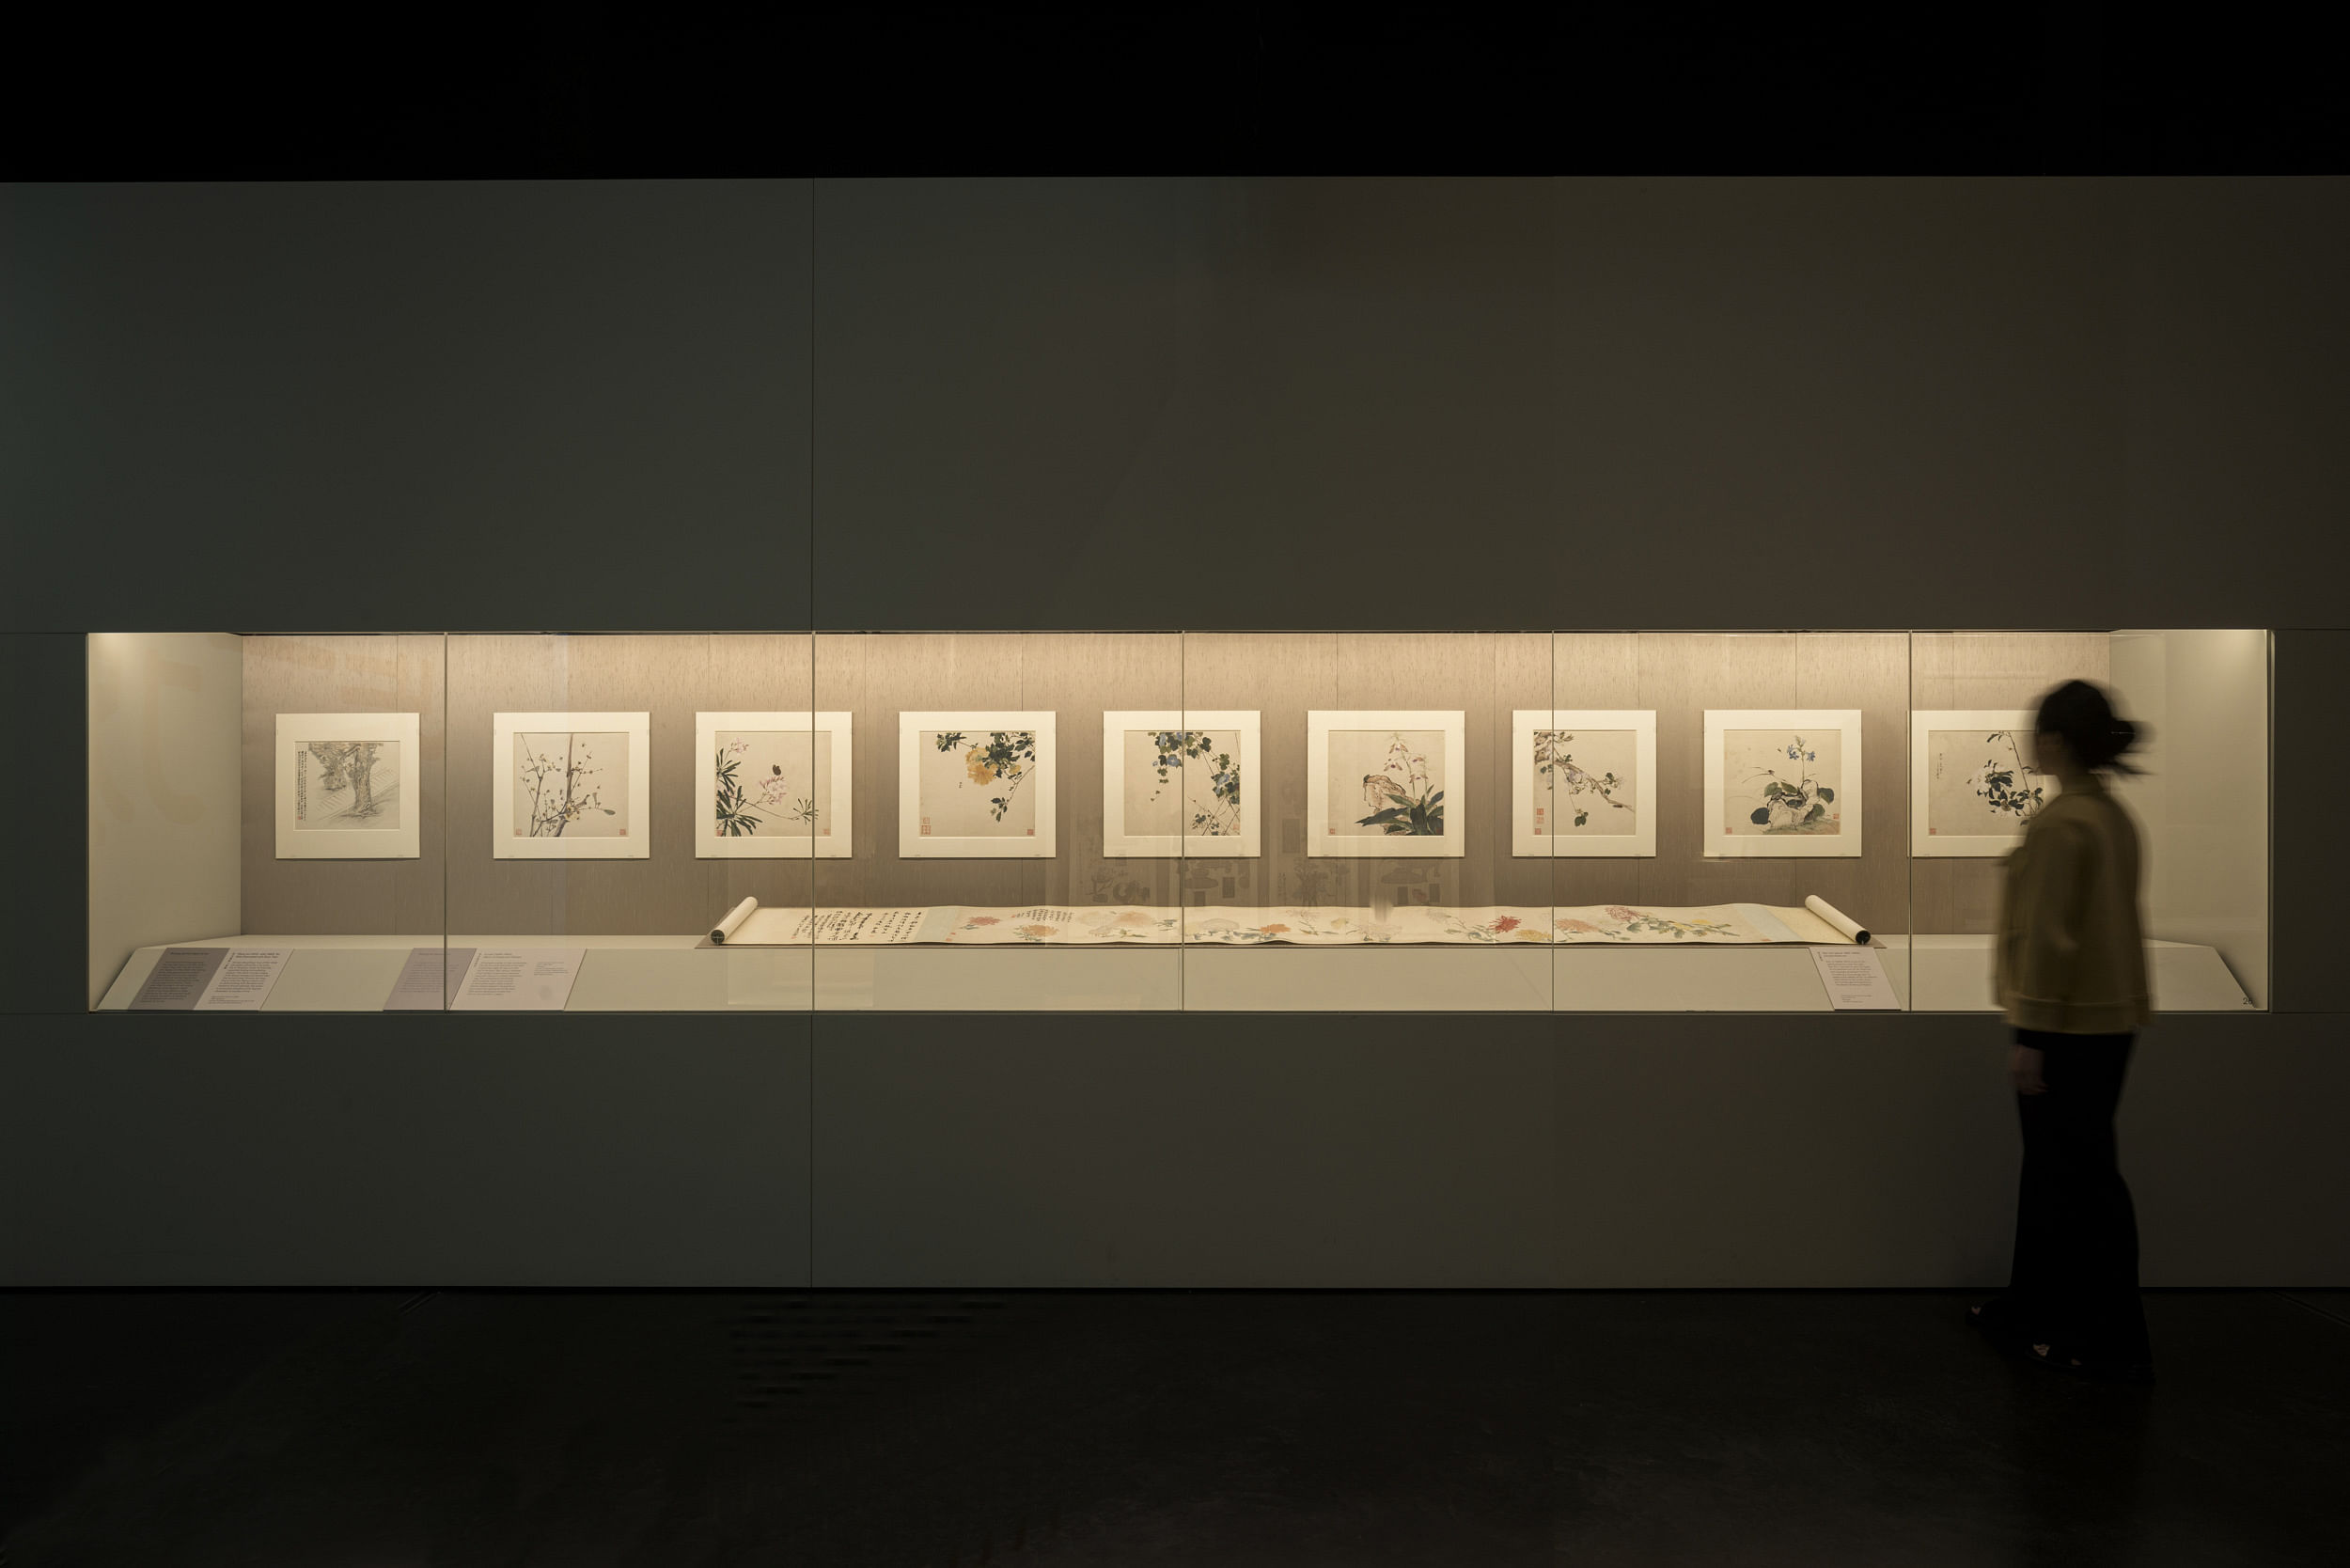
Leaving the turmoil of war, the visitor enters a space that celebrates beauty and innovation, rather like an artist’s studio. This gentle and composed space – with its theme of Artists - embodies the sense of rebuilding and resilience. The visitor sees how this time period also bore fruit in terms of innovation in art, even during the turmoil of war.
This slightly brighter space - with lighting throughout by Beam Lighting Design created to suit each theme - features scroll paintings, calligraphy and album leaves. A film at the end, provided by the Shanghai Museum, slowly unveils the name of the Studio of One Step Back. Banners here illustrate artists’ brushstrokes. The key featured individual is artist Ren Xiong and the highlighted location is Jiangnan, south of the Yangzi River.
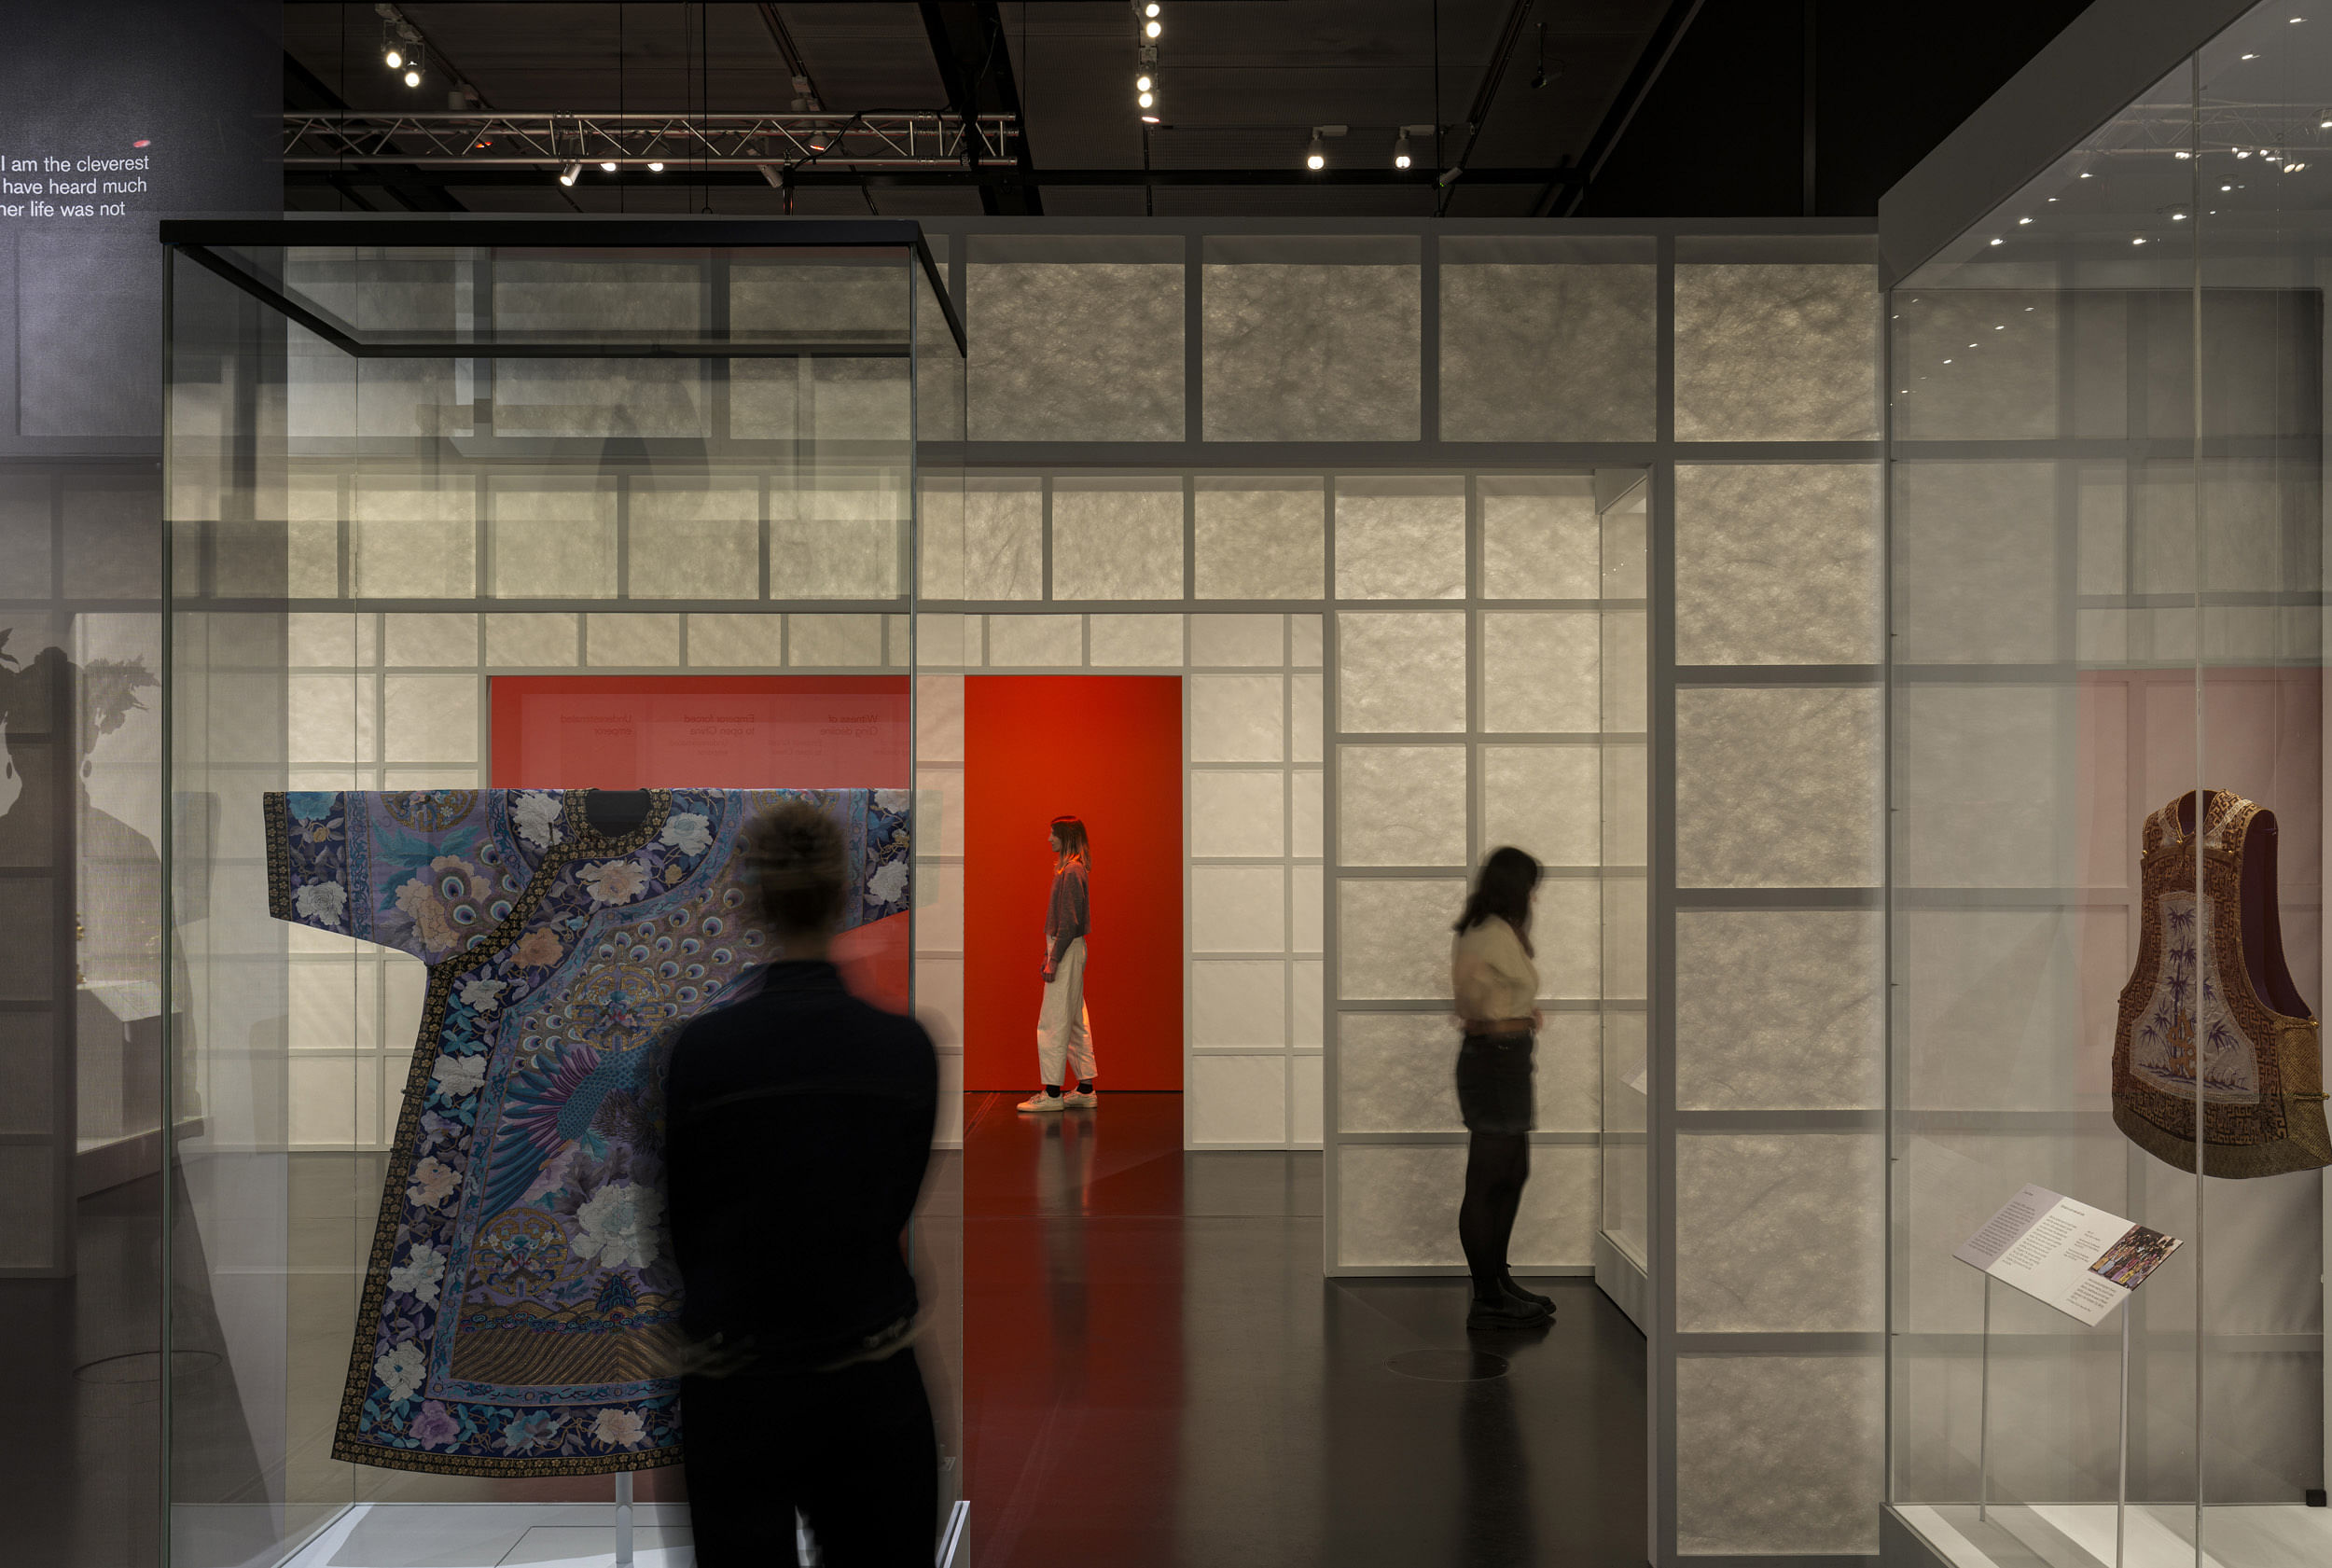
The fourth area – Everyday life – is all about the urban experience and takes the form of a large space representing the hustle and bustle of frenetic streetlife. The design takes inspiration from the streetscapes and intricate interiors of cities such as Shanghai, Ningbo and Tianjin. The individual in focus here is Lady Li, a middle class woman of the era, whose portrait is also included among the exhibits, together with that of her businessman husband.
There are lots of costumes on show – dressed on black fabric mannequins and displayed in glass cases – as well as a plentiful display of high-level banners featuring genuine shop signs from the period, from noodle shops to painting repairers or milk tea sellers. The feeling is as if the visitor is standing in a street and meeting characters within the showcases, with a large graphic backdrop and with an ambient audio of street noises playing all around. The object-rich space also examines families and fashions, roles and experiences, with the design creating pockets of space to conjure up fragments of different lives.
Global Qing, the fifth themed area, is a dramatic circular space – a two-way window showing China looking outwards at the world, beyond via its port cities, and examining its relationship with other nations. Its visual focus is the sky and seascapes and the space features dark blue walls and high-level graphic banners of the sea and boats, using images from the artworks. Hanging banners here – and elsewhere – are 3.2m high in the 6m-high space and follow the circular shape of the gallery.
Featuring scenic but subtle imagery, this section features deep showcases that contain paintings, and artefacts, all contained within a series of windows looking outwards, with the final window also serving as a threshold to lead to the final space. The key individual in this space is the rich merchant Mouqua.
The final area – Reform to revolution – looks at Qing China in its final years, with connections to Japan, Europe and America. The space is defined by its three sections focussing on educational reform, diplomatic reform and military reform, finally resulting in revolution. It’s a darker area, reflecting the closing moment, which is dedicated to the final key person – Qiu Jin - a revolutionary, poet and feminist, who was martyred for the revolution. As you leave the exhibition, you hear the uplifting song that Qui Jin wrote – here performed by the London China Philharmonic Choice. Qiu Jin composed this anthem to stir women into action to leave behind their subservient roles. Like the exhibition itself, these forward-looking and uplifting voices offer hope for a better future and celebrate the resilience and creativity of the people of the 19th century.
Status: Built
Location: London, GB
Firm Role: Exhibition Designer / Graphic Designer
Additional Credits: Photography: Gareth Gardner
Exhibition and Graphic Design: Nissen Richards Studio
Lighting Design: Beam Lighting Design
London College of Fashion Collaboration:
Students: Jialin Li, Yongyi Yin, Min Liang, Maria Evstyukhina, Xuanran Zhou, Yiqi Nie
Course Leader MA Costume Design for Performance: Agnes Treplin
Senior Research Fellow and Principal Lecturer in design for performance: Donatella Barbieri
Models: Wenyuan Xin, Isaac Li, Berry Yao, Dr. Nora Yitong Qiu, Ruiliang Liu, Clark Ho
Director of Photography: Pete Bateson