anchor
Tips & Tricks - 3D terrains

Recently many people at NewSchool have been asking me "How can I create a 3D topo for my project" So I figure I would post a simple Rhino tutorial here to share the steps I go through in creating 3D terrains so that other students with the same question can see how I do it. It might not be the best way - but it definitley works for me. You can click on the following image links at anytime to make them bigger
BEFORE YOU START:
You need to make sure you have installed the pointset reconstruciton tools from the
Rhino Labs and that you have your CAD topography map with all it's topograpy lines placed at their correct elevation heights
STEP-ONE
Begin by entering the
Delaunay (from the pointsetreconstruction tools) command.
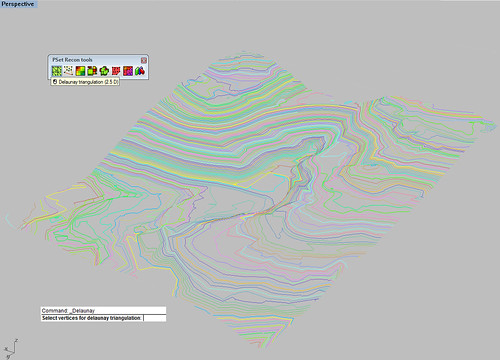 Image 1
Rhino will then ask you to select vertices for delaunay triangulation. You will then need to chose all you topography lines.You can leave the sample interval size at its default which is one
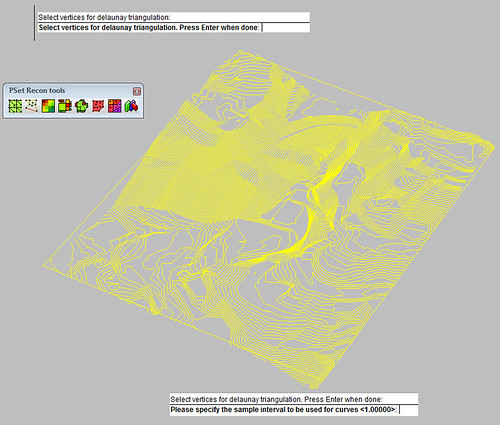 Image 2
Once the triangulation reaches 100% you can then right click on your mouse to complete the command. You will then be able to see that you have created a very colorful triangulated surface - which is not workable at all
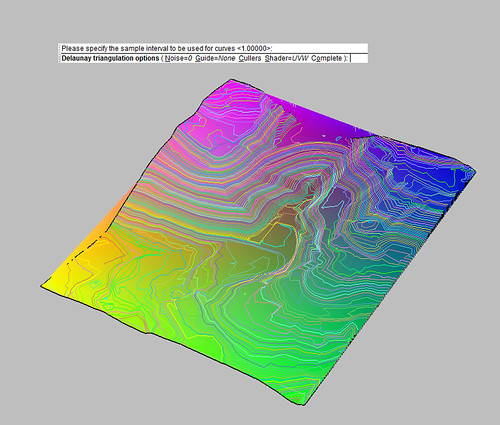 Image 3STEP -TWO
This step requires you to switch to top view (will not work in other views). Once in top view you can enter the
Drape command. Create a crossing window over the triangulated surface to define the area to drape. Leave all the drape options set to their defaults.
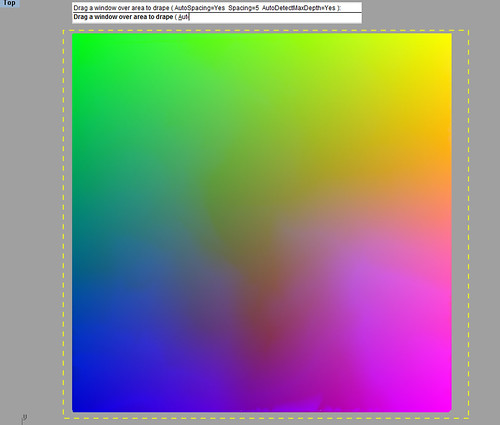 Image 4
Once the command is complete you can delete the colored triangulated surface. This will give you a very cool looking topo that you can now use.
 Image 5
This model is sometime a little difficult to work with - only because of its high amout of control points that are used to give the topo a higher precision finish form.
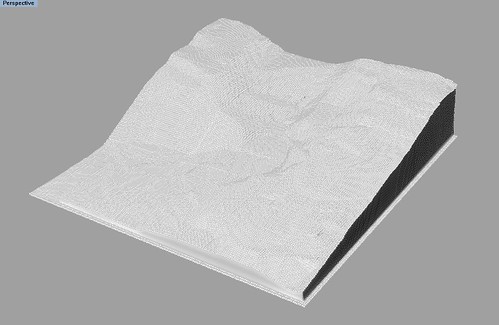 Image 6
(The image that follows shows the high amount of control points used to create this topo)
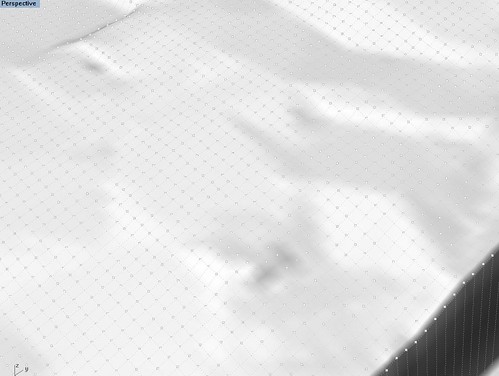 Image 7STEP-THREE
What I would do next is reduce the amount of control points by Using the
Rebuild Command. Which will pop up the rebuild Surface control Panel
 Image 8
Within the control panel you will be able to see how many control points your surface currently has by looking at the point count. You can then reduce to a smaller amount of points. You can currently see that I have chosen to reduce to the amount of 50 (U) and 50 (V) point counts. Which gives a lower precision model -but a much easier model to work with and modify.
 Image 9
That concludes this tutorial on how to create 3D topos
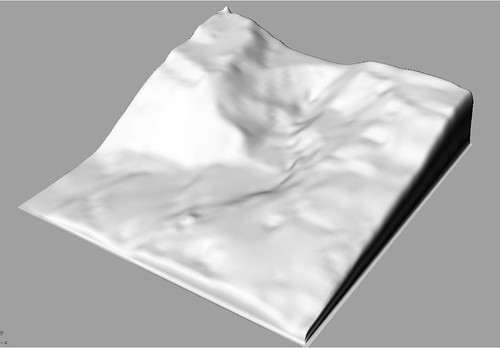 Image 10
Some people chose to use the
RhinoTerrain plugin which works the same way as the pointset reconstruction tools plugin. Instead of using the delaunay comand you use the Rhinoterrain version which is RTdelaunay. You then follow all the same steps shown here (TWO & THREE) to create a workable 3d Terrain.
I hope this helps

")
9 Comments
great post diff!
damn, makes me almost want to learn Rhino
damn, makes me almost want to learn Rhino too
Thanks! Looks like a good way to do it! I wonder whether there might be a way in MAX - the terrain function there works quirky at best in my experience.
Cheers,
Daniel
I'm curious as to why you're deleting the original delauny surface--is it because it has the UVW shader applied to it?
It's possible to turn that off before finishing the command--you have the choice of None, XYZ, UVW, Deviation, Slope, Terrain, Occupancy and UVParameter.
oops: delaunay
Rehiggins
You could just turn it off. The reason I delete it is because no matter how you set it up your parameters you can't really modify the surface due to it being triangulated mesh. The mesh seems more to difficult to modify compared to a nurb surface. The drape - creates a nurb surface.
thanks for the tutorial. shows those trapped in the autodesk google mindset the way :)
Played around with this a bit: Delaunay seems to work better with a point cloud. Using points allows you to build a much larger mesh before running out of memory. If you want to turn the resulting mesh into a nurbs surface you can use the rhino Rhino Redsurf plug-in (commercial but a very usable demo). http://www.resurf.cn/index.htm http://www.rhino3d.com/resources/
Rhino Resurf's RsMesh2Surf does a much better job than drape.
Block this user
Are you sure you want to block this user and hide all related comments throughout the site?
Archinect
This is your first comment on Archinect. Your comment will be visible once approved.