
Jan '07 - Jun '07
Plastic continues to devour my thoughts. It is a reciprocal fascination. Here, this may be a little dry compared to other posts. I plan to briefly discuss some of the processes and techniques involved in working plastics. Okay. It should be noted, shaping plastic can be done in many different ways. Heat it to a point of super pliability. Do something. Allow to cool. The following is one process (Please note all images are not of the same piece but all all are from the same whole):
Computer Numerical Controlled (CNC) Milling. A digital model, in this case Rhinoceros, is imported into Surfcam. Surfcam translates the surfaces into a language the mill understands. Upload the file to the mill. This is a six inch deep block of low density foam. Two sweeps: rouch cut, finish cut. It can be a long process. This particular piece may have been twenty by sixty inches. Maybe six hours of milling. Prepping the file for milling does not take much time at all. This direct transfer from virtual to real is key here. Almost every week across the ten week process we pulled the work out of the computer. Both working methods inform one another in an almost one to one relationship (we do not have a three-d scanner, which might close the working loop).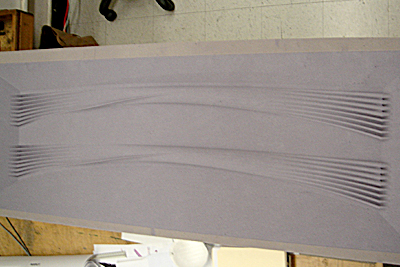
Soon, we had something like this. Clean it up a bit. Poke a matrix of tiny holes across the surface with particular attention in and around features.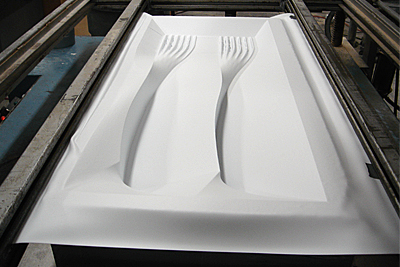
Now, duct tape the foam to the base of the vacuum former. The duct tape helps to create an air seal around the piece. The first plastic we pull to the foam is typically either Acrylonitrile Butadiene Styrene (ABS) or polystyrene (pictured). This plastic works as a buffer between future plastics pulled and the foam. It will never be removed from the mold because any attempt to remove the plastic would destroy the foam mold. Basically, this technique enables us to make multiple pieces from one form. Afterwards, this piece needs to have the excess plastic trimmed and a new set of holes poked through the new surface and foam opening air flow.
Form the final pieces. This time Polyethylene Terephtalate Glycol (PETG), a clear plastic ideal for vacuum forming. In this photo, the plastic is being heated just prior to pulling. Mostly, this is an eyeball process. I cannot remember if I effed this piece up taking this photo... because it is essentially ready. If the plastic gets too hot, it will not seal properly. If it is not hot enough, it will not be flexible enough to conform to the form's surface. Practice makes perfect.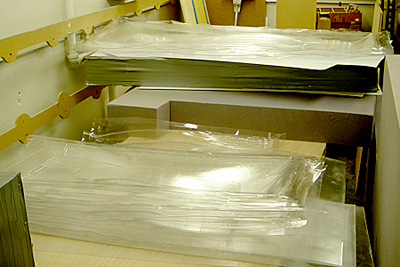
Now, we have the thirty pieces needed for our final composition, plus an additional eight for backup. The excess plastic needs to be trimmed. This is not a fun job, so I am glad Scott volunteered. For this project, we used 1/32” thick PETG. Therefore, trimming could be done with scissors. The summer project was 1/8” thick PETG. That time, I had to use a band saw and three sweeps sanding the edges. Still, the finish was not stellar. Scissors makes an infinitely cleaner edge. We are currently researching an alternative to sawing for SS|2. The plastic for that project is 1/16”. But, that is a story for another day.
Now, all the pieces are ready for painting. Up to this point, none of our tests worked as we envisioned. Less than a week before deadline, I put these pieces together. It worked. Unfortunately for my team, I was the only one to see it together as it needed to immediately be disassembled. They remained somewhat faithful.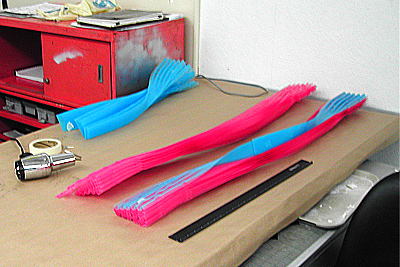
Here, we had just finished air brushing all the pieces. Some of the micro scale work for the LEDs did not fit as well as planned. Vacuum forming is by no means an exact process. Each piece had slight variations. In order to resolve this problem, we did some extra careful heat gun work. The heat gun can get sloppy and is less precise than vacuum forming. Be careful!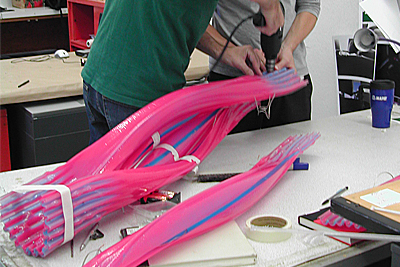
About ninety minutes until presentation. We are tired. I am irritable and nervous. Whatever, get it together. That is Scott's drill and my hairy arm.
Twenty minutes until presentation. Aaron is finishing the wiring of the lights. The airbrush paint is touchy. It scratches easily. We did clear coat the pieces, which helped tremendously. Still, be careful. And, that is about it. Somehow, we finished it up in time and the results are in a previous post. I hope this has been at least a little enlightening.
-jt

")
")
6 Comments
enlightening? these photos are giving me flashbacks. Actually, I'll have to say that the final days of that project were truly a surreal experience. My presentation 15 minutes later, however, was not.
TAD(S)cott
Scott! I wish I had a video of that presentation. OUCH! Jason was like, what the hell is wrong with you guys... defend yourselves! To which the group responds with a blood soaked gargling noise, transient mental collapse and silent gaze that would have turned medusa to stone.
If they had rubbed it more, I'm sure it would have made believers out of them. We fired back a little bit. Often times it feels like final reviews are set up more for the jury to talk and students to listen, especially towards the end when time compresses groups together.
"Often times it feels like final reviews are set up more for the jury to talk and students to listen"_aha
Hmm I hope you didn't figure this out this late in the game!!
TADS (meaning all of your crew): Great post.I tend to share your flashback since it reminds me of our independent study project during our last in year at Columbia in 2005.
At the time, my wife and partner, Zoë Coombes and a great colleague of ours, Alex Pincus were really interested in giving a try to CNC, vacuum forming and doing a series of explorations that lead to a great installation during our end of year exhibition, in fact it became really tense at some points but in the end it really worked out great. In the end, Alex has been able to continue his explorations on atmospheric landscapes and albedo studies (among many other tecnique based interests) and currently works as a Senior Designer at Asymptote, Zoe and I opened our design studio, Commonwealth™.
Following are a couple of links to Alexander Pincus blog which contains some of the images of this Candelabra project.
See here:
***By the way, those are not renderings. The assembly pictures were comisioned by Alex to photographer Isa (sorry can't remember his last name!...but this is his link: www.isawipfli.com )
http://www.pinc.us/futures-exploding/prototype.html
http://www.pinc.us/futures-exploding/component-o1.html
http://www.pinc.us/futures-exploding/candelabra.html
http://www.pinc.us/futures-exploding/assembly.html
good explanation...and great results!
FDB; Thanks for sharing the images! That project is closer to the scale of the project I am currently working, which I will post on here when it is a little further developed. Did you get to a point of embedding lights into this piece?
Block this user
Are you sure you want to block this user and hide all related comments throughout the site?
Archinect
This is your first comment on Archinect. Your comment will be visible once approved.